Zoom Transcriptions (for Zoom Cloud and Kaltura)
One of the great things about Zoom’s “Cloud Recording” option is the ability to create text-based transcriptions of your meetings. In order to use the feature, you’ll want to check your account settings under the “Recording” tab and make sure “audio transcript” is enabled.
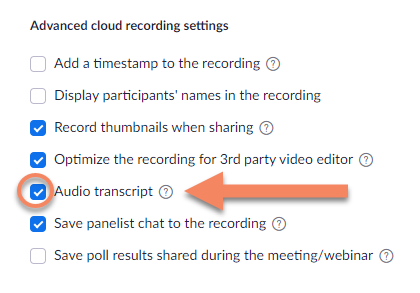
When you’re ready, launch your meeting and choose the “Record to Cloud” option to create your recording. (Please note that the transcription feature is cloud-based and requires the recording to be saved to the Cloud server. There will be no transcript for recordings made with the “save to computer” option.)
When your recording is ready, you’ll find it under the “Recordings” tab on your account page. The transcription will appear in a window to the right of the video and will scroll along as the video progresses. (NOTE: The transcription will take some time to complete and may not be ready until an hour or two after your recording is done). You also have the option to view the transcription as Closed Captions superimposed over the bottom portion of the video image.
By default, all your Zoom Cloud Recordings copied from the Zoom server — where they expire after 60 days — to your Kaltura account, where they can stay for as long as you choose. However, the Zoom transcripts do not transfer to Kaltura with their respective videos. Kaltura will provide its own computer-generated captions for your file, but you may find you still like the Zoom version better.
The good news is you can manually load your Zoom transcript to Kaltura if you wish. To do so, find your Zoom Cloud recording on your account page and download its “audio transcript” file to your desktop.
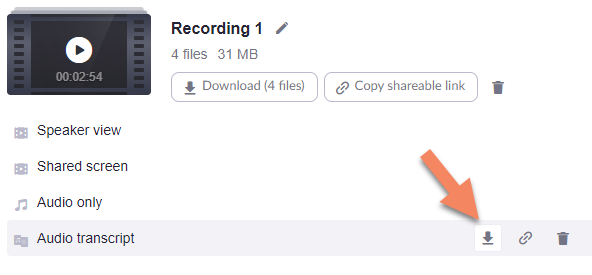
The transcript is saved as a “.vtt” file. The easiest way to deal with it is to open it in a text editor like Notepad, then save it out again with the “.txt” extension.
The next step is to log in at vcu.mediaspace.kaltura.com and find the Kaltura version of your recording under “My Media.” Then click on “Actions” and “Caption and Enrich.”
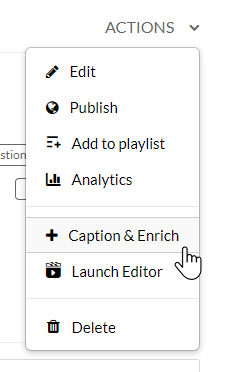
The value listed for “Feature” will be “Captions” by default. That refers to Kaltura’s native captioning feature. Change this setting to “Alignment.”
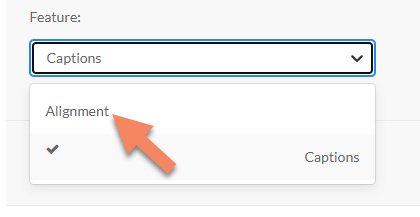
Point Kaltura to the .txt file you saved on your computer and upload it. Kaltura will begin the process of synchronizing the Zoom transcription to the video. This will take about 30 minutes, after which “Zoom” will appear as a new option whenever you choose to view captions.
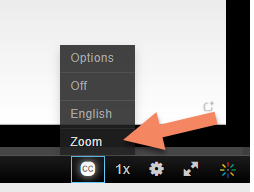
Zoom captions differ somewhat from the Kaltura version in that all quotes are attributed to a speaker (for example, JOHN SMITH: “Welcome to the meeting”).
Again, you may find it unnecessary to copy your Zoom transcripts to Kaltura, since Kaltura offers captions of its own. However, some users find Zoom’s transcriptions more accurate, while others may just like seeing each quote attributed to its speaker.
Either way, you have the option to create and download transcriptions for all your Zoom Cloud Recordings, even if it’s only to file them away for your records.
Categories accessibility, features, recordings