Creating Accessible Slides at VCU: Choosing the Right Tool and Workflow
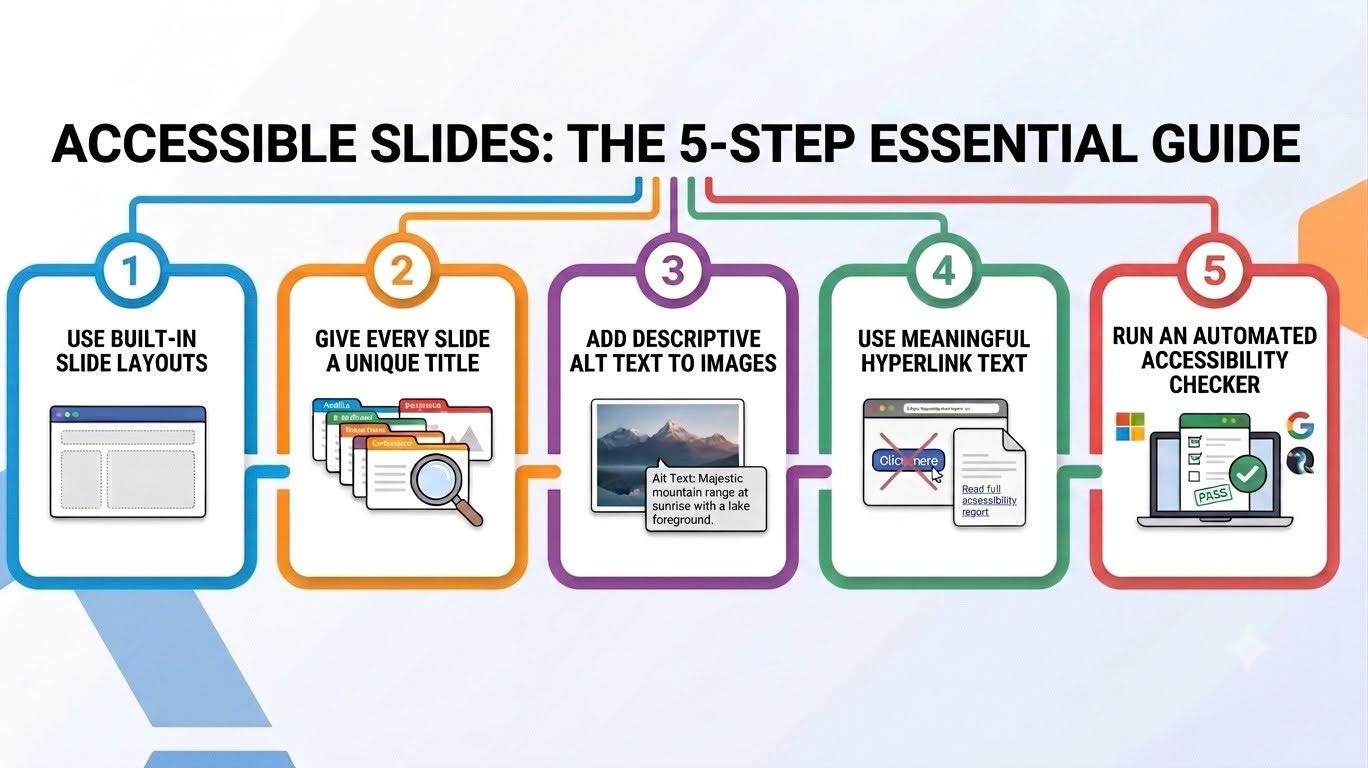
Figure 1: The 5-Step Essential Guide to Accessible Slides.
Slide decks often become more than visual aids. Students may use them as study guides, references for recorded lectures, or downloadable course materials. Building accessibility into a presentation from the beginning makes the content easier to navigate and understand, reducing the need for extensive remediation later.
VCU provides access to Microsoft PowerPoint, Google Slides, and Gemini Notebook. VCU users can also use the Grackle extension to identify accessibility concerns within Google presentations.
Each tool has strengths, but no automated checker can identify every barrier. Manual review and human judgment remain essential. For elements that need to be assessed before the presentation can be given to students as a resource, review an earlier LEDstudio blog, “Quick Tips to Ensure Accessibility in Online Course Material.”
Which Tool to Choose
PowerPoint for Complexity and Accessibility
It is usually the stronger option for decks containing tables, charts, diagrams, multiple images, audio, or video. Its Accessibility Checker and reading-order tools make it easier to identify and repair structural problems. It also has a strong built-in accessibility review tool.
Google Slides for Collaboration
It works well when multiple people or groups need to edit the same file. For the best results, use the slide templates for each deck, keep the layout simple, use the provided placeholders, and run Grackle Slides before sharing the presentation. Include all accessibility elements as you create your presentation. The Grackle extension will need to be downloaded and launched to review your slides.
Gemini Notebook for Ideas
Notebook can help organize information and generate an initial slide deck, but the generated file should not be treated as a finished accessible resource and will need to be remediated in Acrobat Pro.
PowerPoint Workflow and Tips
1. Start with built-in layouts
Choose a layout from Home > New Slide instead of constructing the slide from separate text boxes. Built-in layouts provide title and content placeholders that are more likely to follow a logical reading order.
2. Give every slide a unique title
Slide titles help screen reader users understand where they are and move through the presentation.
3. Add purposeful alt text and review reading order
Alt text should explain why an image matters in the context of the slide. A chart description, for example, should communicate the main trend rather than simply state that the slide contains a chart.
Use the Reading Order pane to confirm that the title, body content, and visuals will be announced in a logical sequence. Only remove an object from the reading order when it is truly decorative. If an object is excluded, any alt text attached to it will not be announced.
4. Run the Accessibility Checker
Select Review > Check Accessibility and address the errors, warnings, and tips. The checker can identify many common problems, but complete the process with a manual review of the slides.
PowerPoint tip: Some versions use a Reading Order pane, while others use a Selection pane. Confirm which one you are using because the objects may be displayed in a different order.
Google Slides Workflow and Tips
The first two steps are very similar to the PowerPoint workflow:
1. Start with built-in layouts
Select Slide > Apply layout and enter content within the provided title and body placeholders. Avoid building slides from separate text boxes, which can create an illogical reading order.
2. Give every slide a unique title
Unique slide titles help screen reader users identify their location and navigate through the presentation. A title box can be found in the Slide > Layout drop down. This is difficult to remediate if you do not use a template.
3. Turn on accessibility features and set the language
In Google Slides, open Tools > Accessibility settings and turn on the options appropriate for your workflow:
- Screen reader support
- Braille support
- Screen magnifier support
These settings support accessible navigation and testing, but they do not automatically make the presentation accessible.
Next, select File > Language and choose the primary language used in the presentation. Setting the language helps assistive technology pronounce and interpret the content correctly.
4. Add accessible content and check the reading order
Use Google Slides’ built-in bulleted and numbered list tools rather than manually typed symbols. Add concise, meaningful alt text to informative images and remove empty text boxes or extra blank lines.
Use the Tab key to move through the objects on each slide. The focus should move from the title to the main content and then to supporting images or other elements in a logical order.
5. Launch Grackle Slides
For the best results, launch Grackle early in the process and run it again after the deck is complete:
- Select Extensions > Grackle Slides > Launch.
- Review the errors and warnings in the Grackle sidebar.
- Address missing titles, alt text, contrast concerns, empty elements, and other identified issues.
- Use Grackle’s TAG feature to identify table header rows and columns, since Google Slides cannot do this natively.
A Note About Gemini Notebook Slides
Gemini Notebooks generate slides about specific topics and can be helpful for producing a quick draft. However, exported decks are not accessible without remediation in another tool.
When possible, download the PowerPoint version and review the slide titles, alt text, reading order, links, tables, and color contrast in PowerPoint.
If the presentation will be distributed as a PDF, use Adobe Acrobat Pro to review and remediate the PDF’s tags, document properties, reading order, headings, and figure descriptions. A Notebook-generated PDF should not be shared as an accessible course resource until that remediation and manual review are complete.
Start with Accessibility, Not Remediation
The most effective accessibility workflow begins before the slides are filled with content. Choose the tool that fits the way you need to work, use its built-in structure, and leave time for both automated and manual review. It is helpful to create accessible templates that can be reused easily for repetition.
It is understandable if you have presentations that need remediation for the upcoming compliance deadlines. You can choose to use the remediation methods and tools available to VCU, or you can recreate the presentations using your newly garnered knowledge.
For additional information about how to remediate individual issues in your presentations or if you would like help setting up an accessible template, visit LEDstudio.vcu.edu to check out our workshops and attend our Open Office Hours.
Categories Accessibility, id process, models, resources, teaching online