Navigating RAMS-IRB to Create and Navigate Through New Studies
This RAMS Gif Guide is intended for researchers and research teams using the RAMS-IRB system to manage IRB submissions. This guide will walk users through the process of creating a new study, various methods for navigating through a study, and how to submit a study to the IRB for review.
You can access more RAMS Gif Guides made for researchers by using the researcher gif guide tag on our blog. View all gif guides by using the RAMS Gif Guides tag on our blog.
Creating a New Study
To create a new study in RAMS-IRB, log in and from the home page, select the “New Study” button from under the “Create” menu.
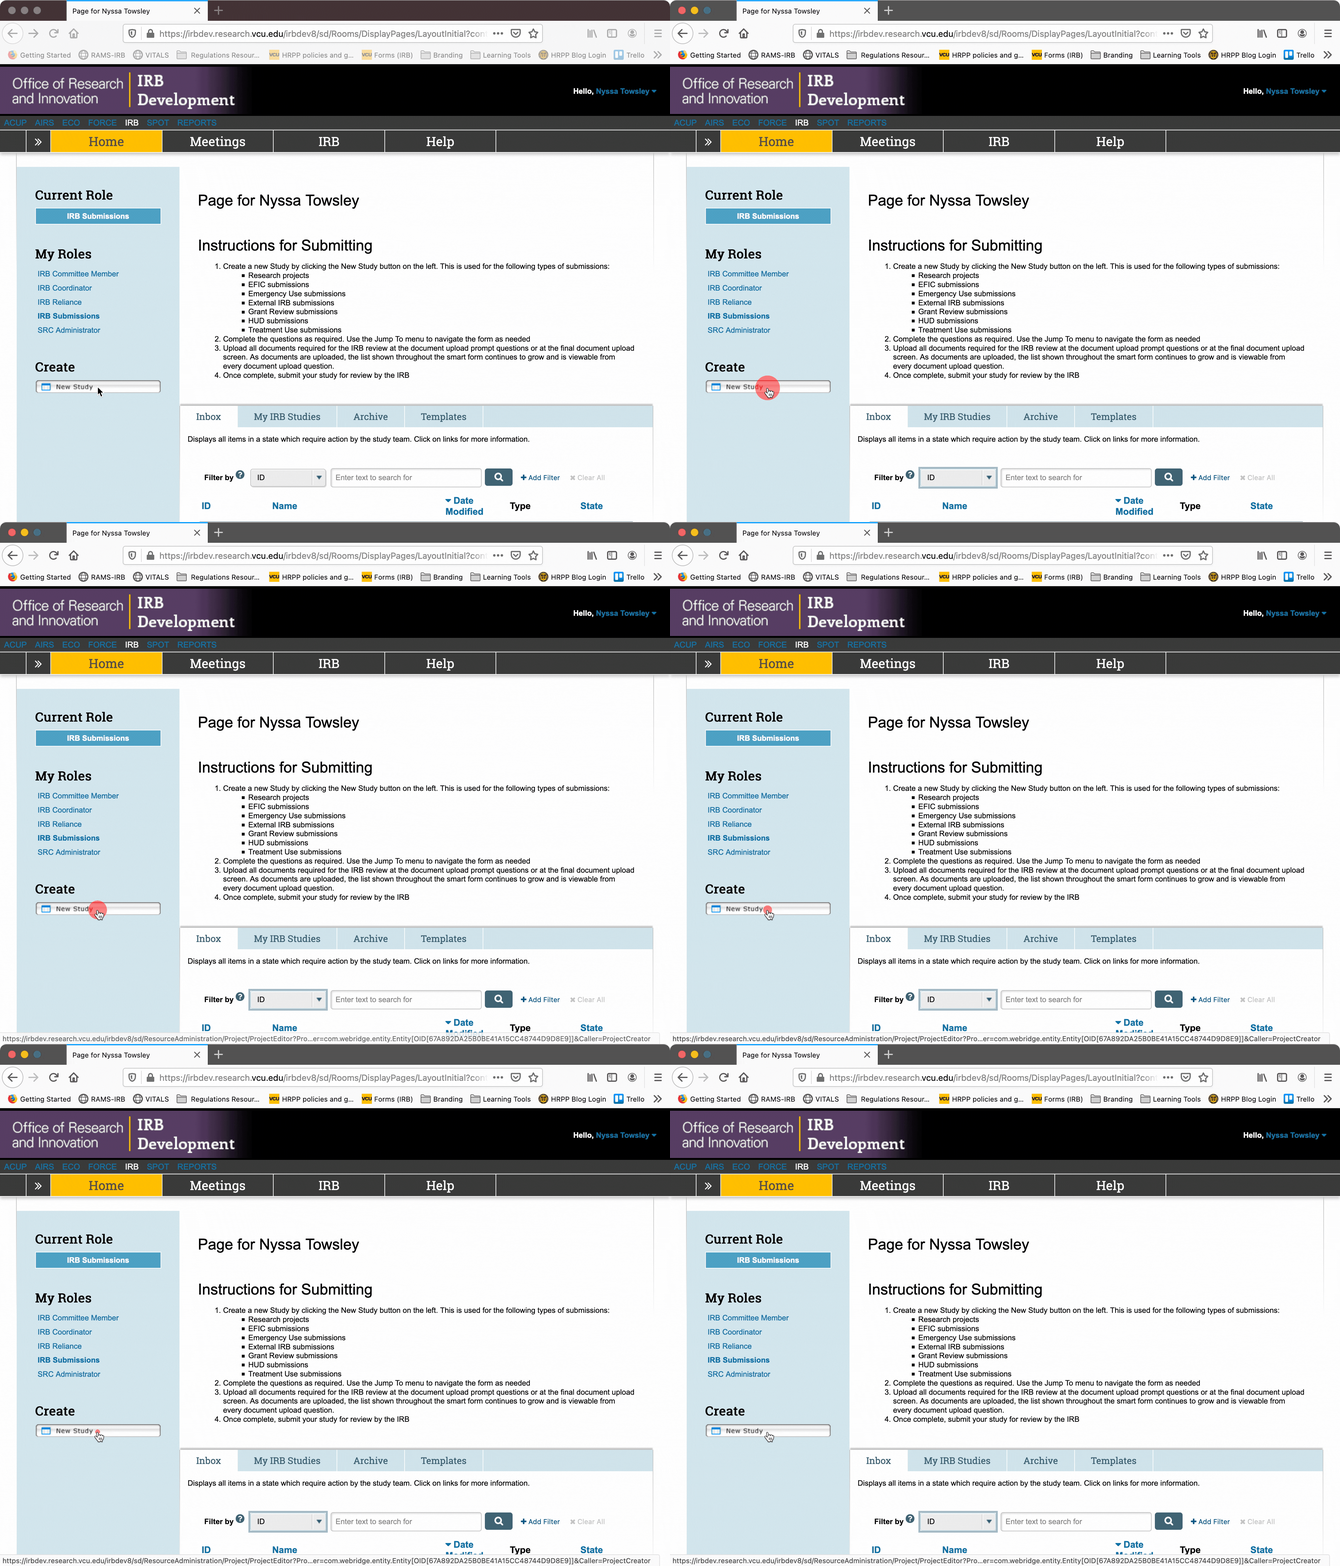
Doing so will automatically open the first page of what we call the “Smartform.” The “Smartform” is the collection of questions asked in the RAMS-IRB system intended to elicit the information needed to conduct IRB review. It is “smart” because it uses branching logic to only populate certain questions or pages based on responses to earlier questions. It is a “form” because the user experience is similar to filling out an online form.
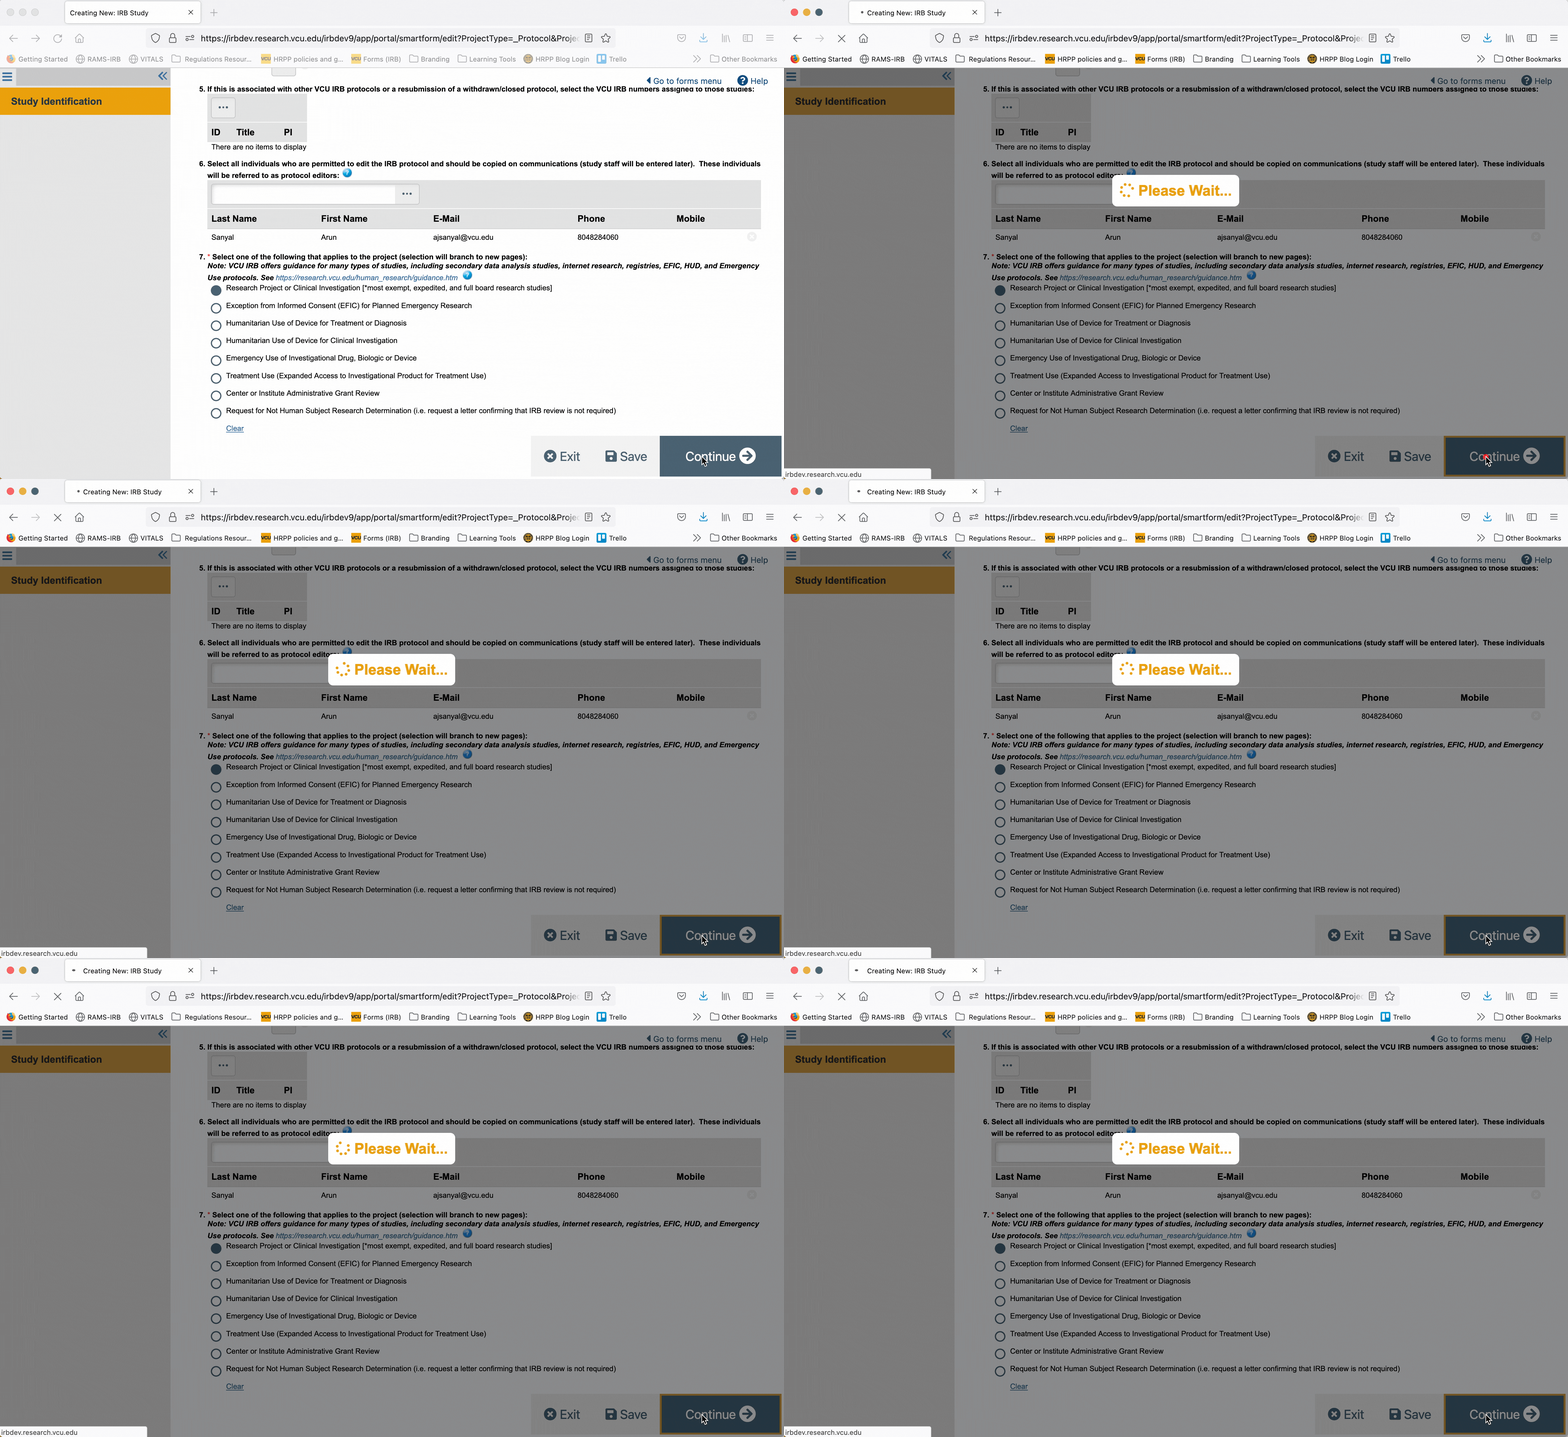
You will need to complete the first page of the Smartform (the Study Identification page) to designate the PI of the study and to list any “Editors” you want to have access to and the ability to edit the Smartform.
NOTE: if someone other than the PI is completing this page, the non-PI study personnel should be sure to list themselves as an “Editor” in question #6 BEFORE navigating away from the Study Identification page. If this is not done, the non-PI individual will be kicked out of the Smartform and will not be able to edit it until the PI logs into RAMS-IRB and edits the study to add the individual as an Editor.
Once you have completed the Study Identification page (the first page of the Smartform), click the “Continue” button, and the rest of the Smartform will be generated.
Navigating the Smartform
There are two ways to move through the Smartform as you fill it out for your study: use the “continue” button to move sequentially, or use the navigation menu to jump to specific pages/sections.
Navigating Sequentially
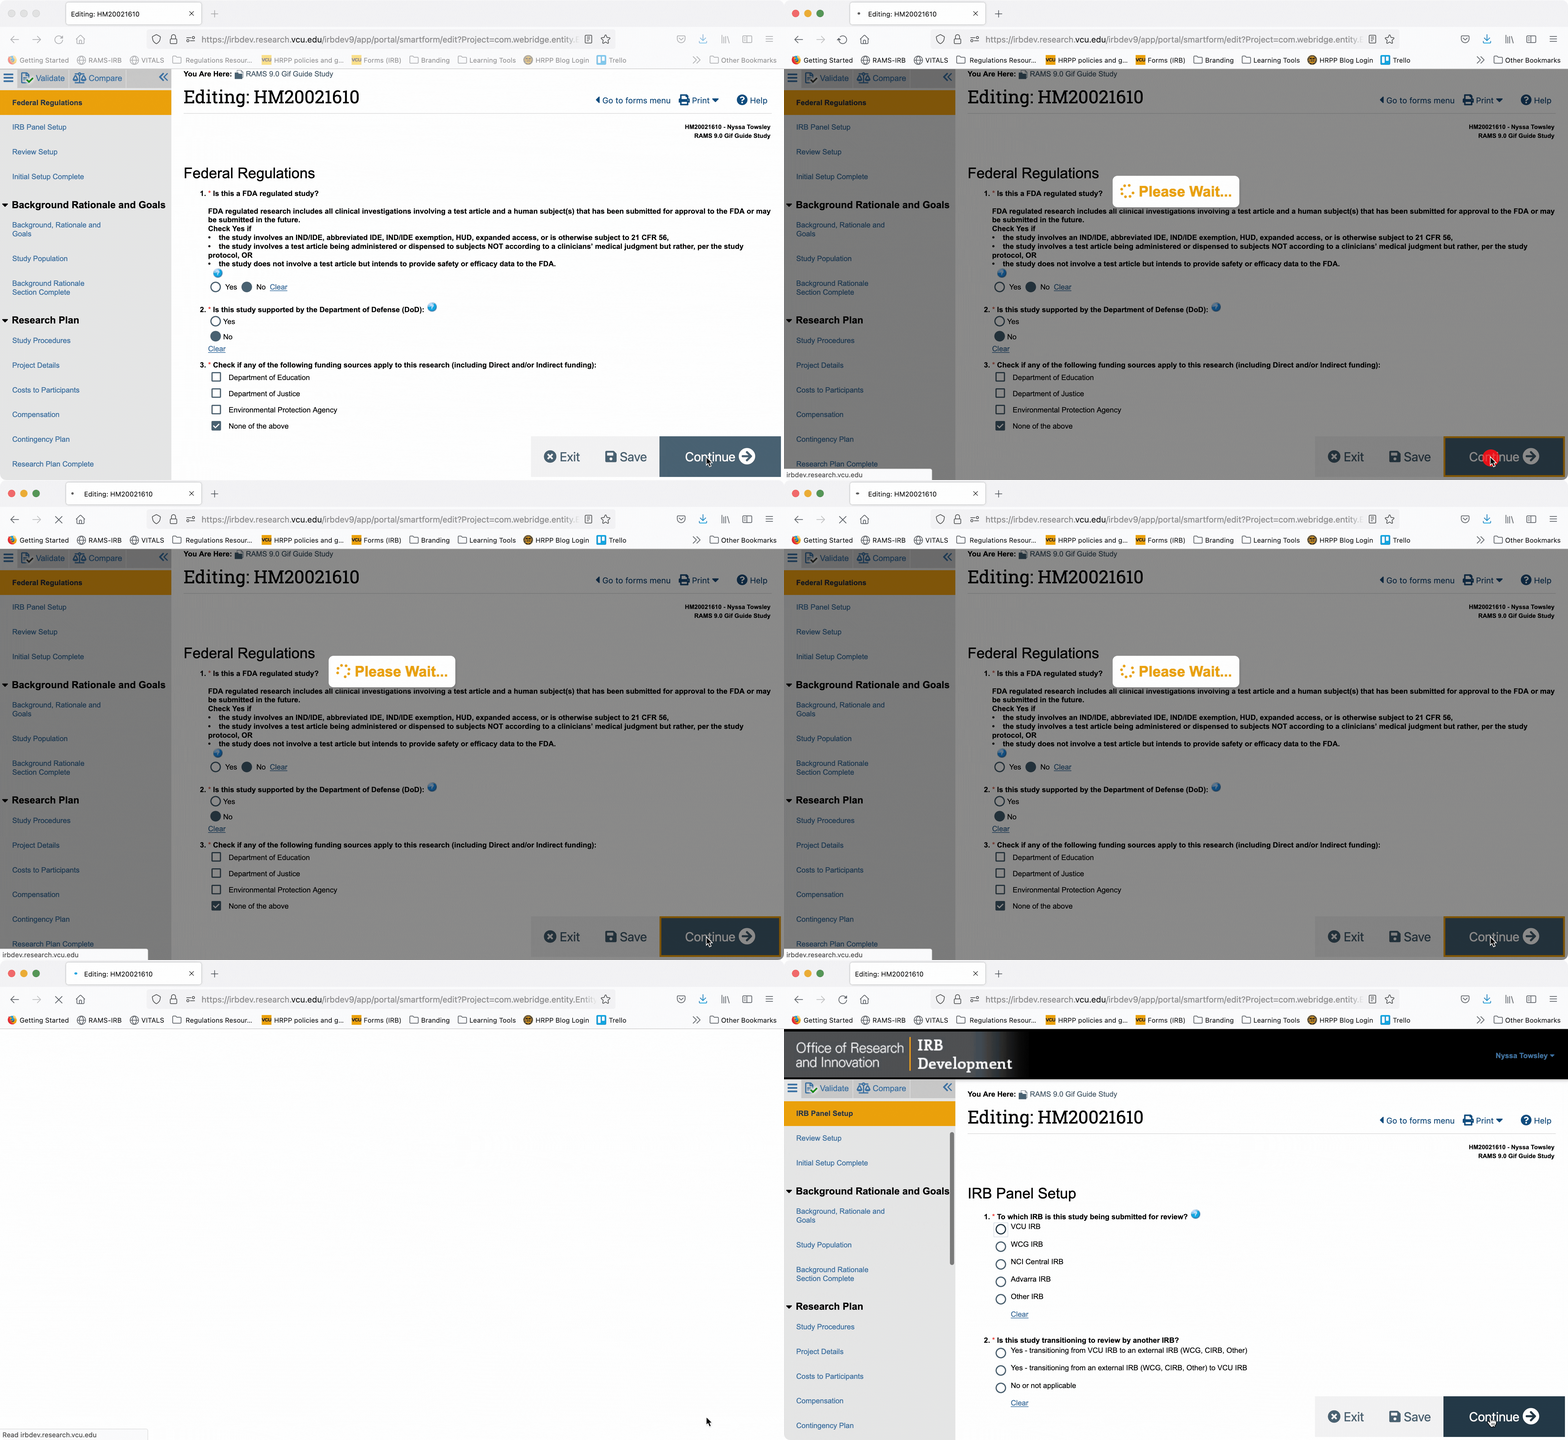
To navigate sequentially, the “Continue” button can be used to go to the next page in the Smartform.
Using the Navigation Menu
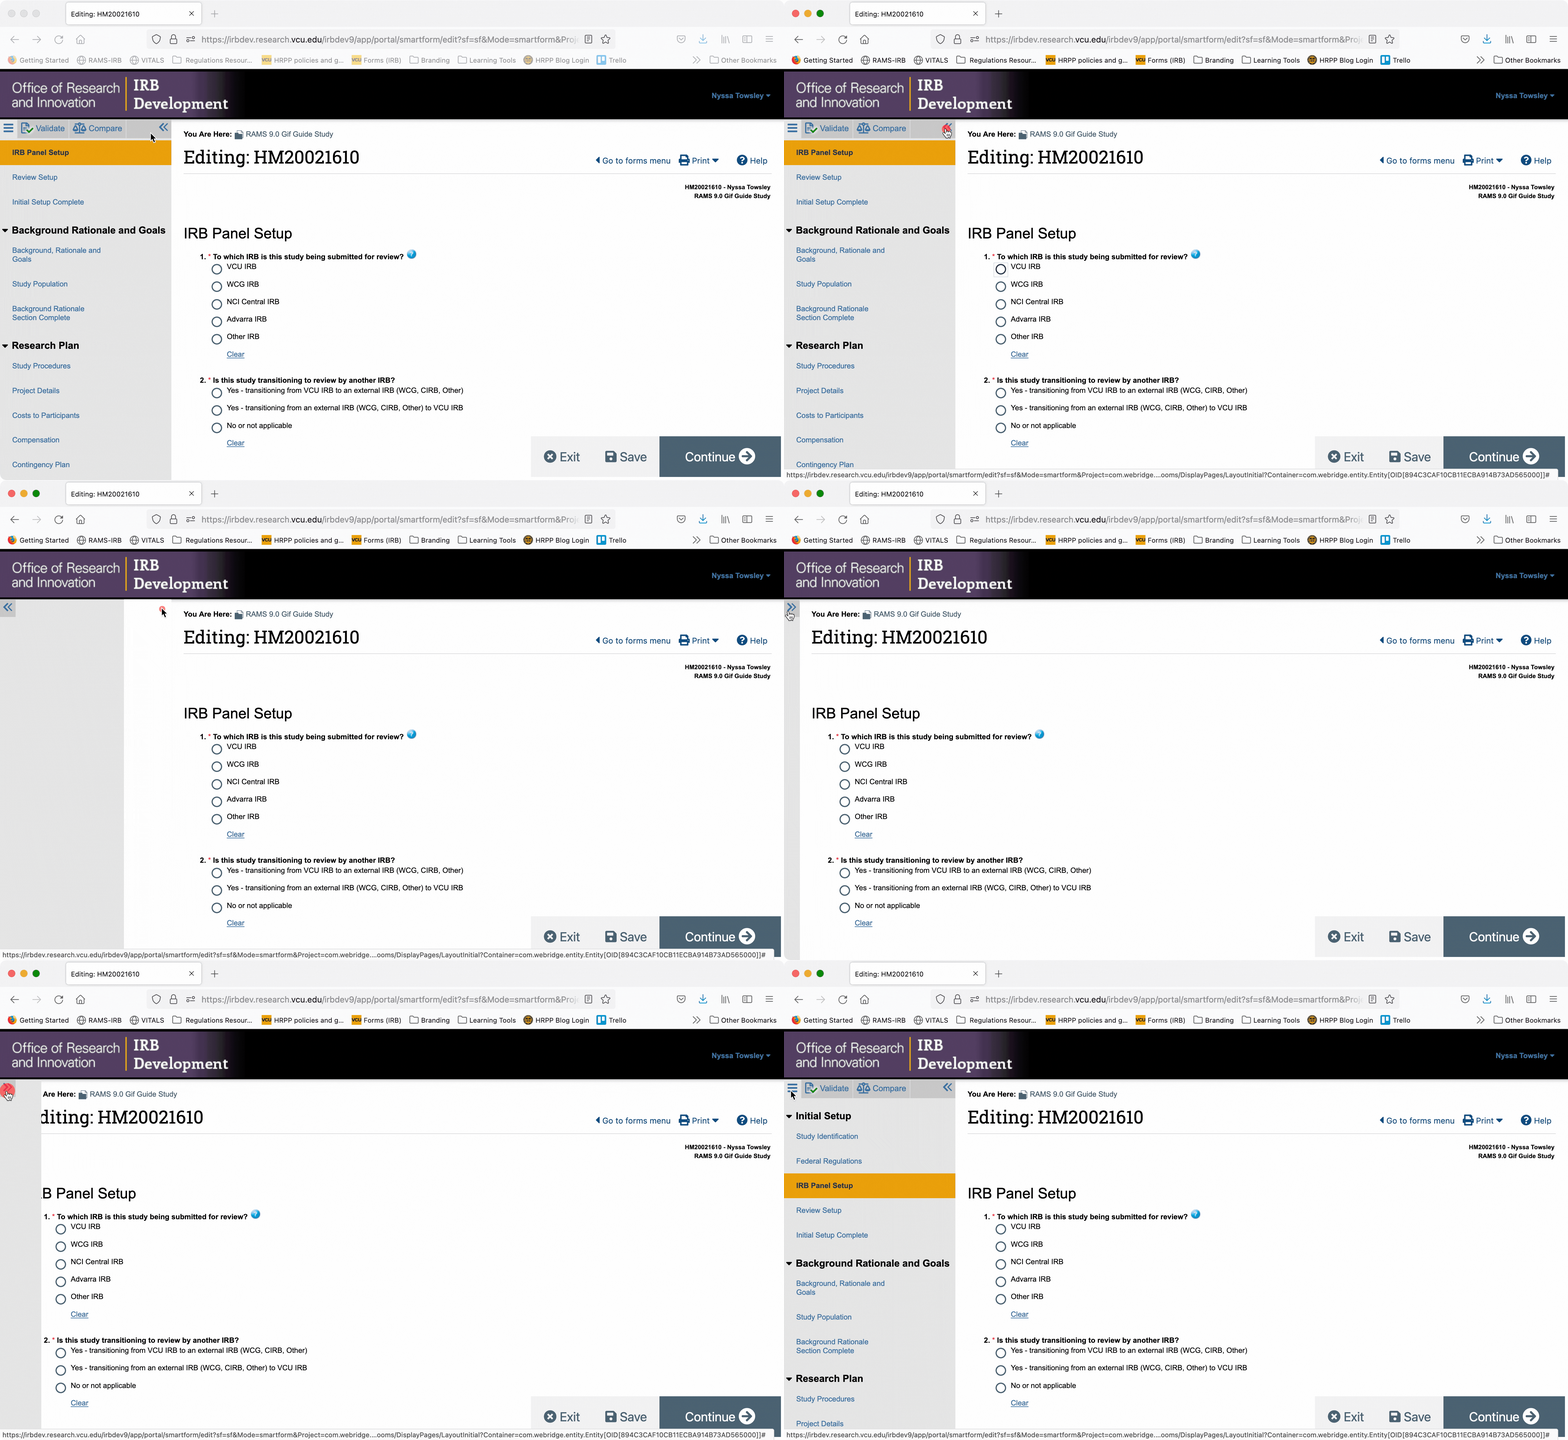
You can also jump directly to specific pages of the Smartform by using the Navigation Menu on the left side of the screen. Click on a page name in the navigation menu and you will automatically be taken to the corresponding page in the smartform.
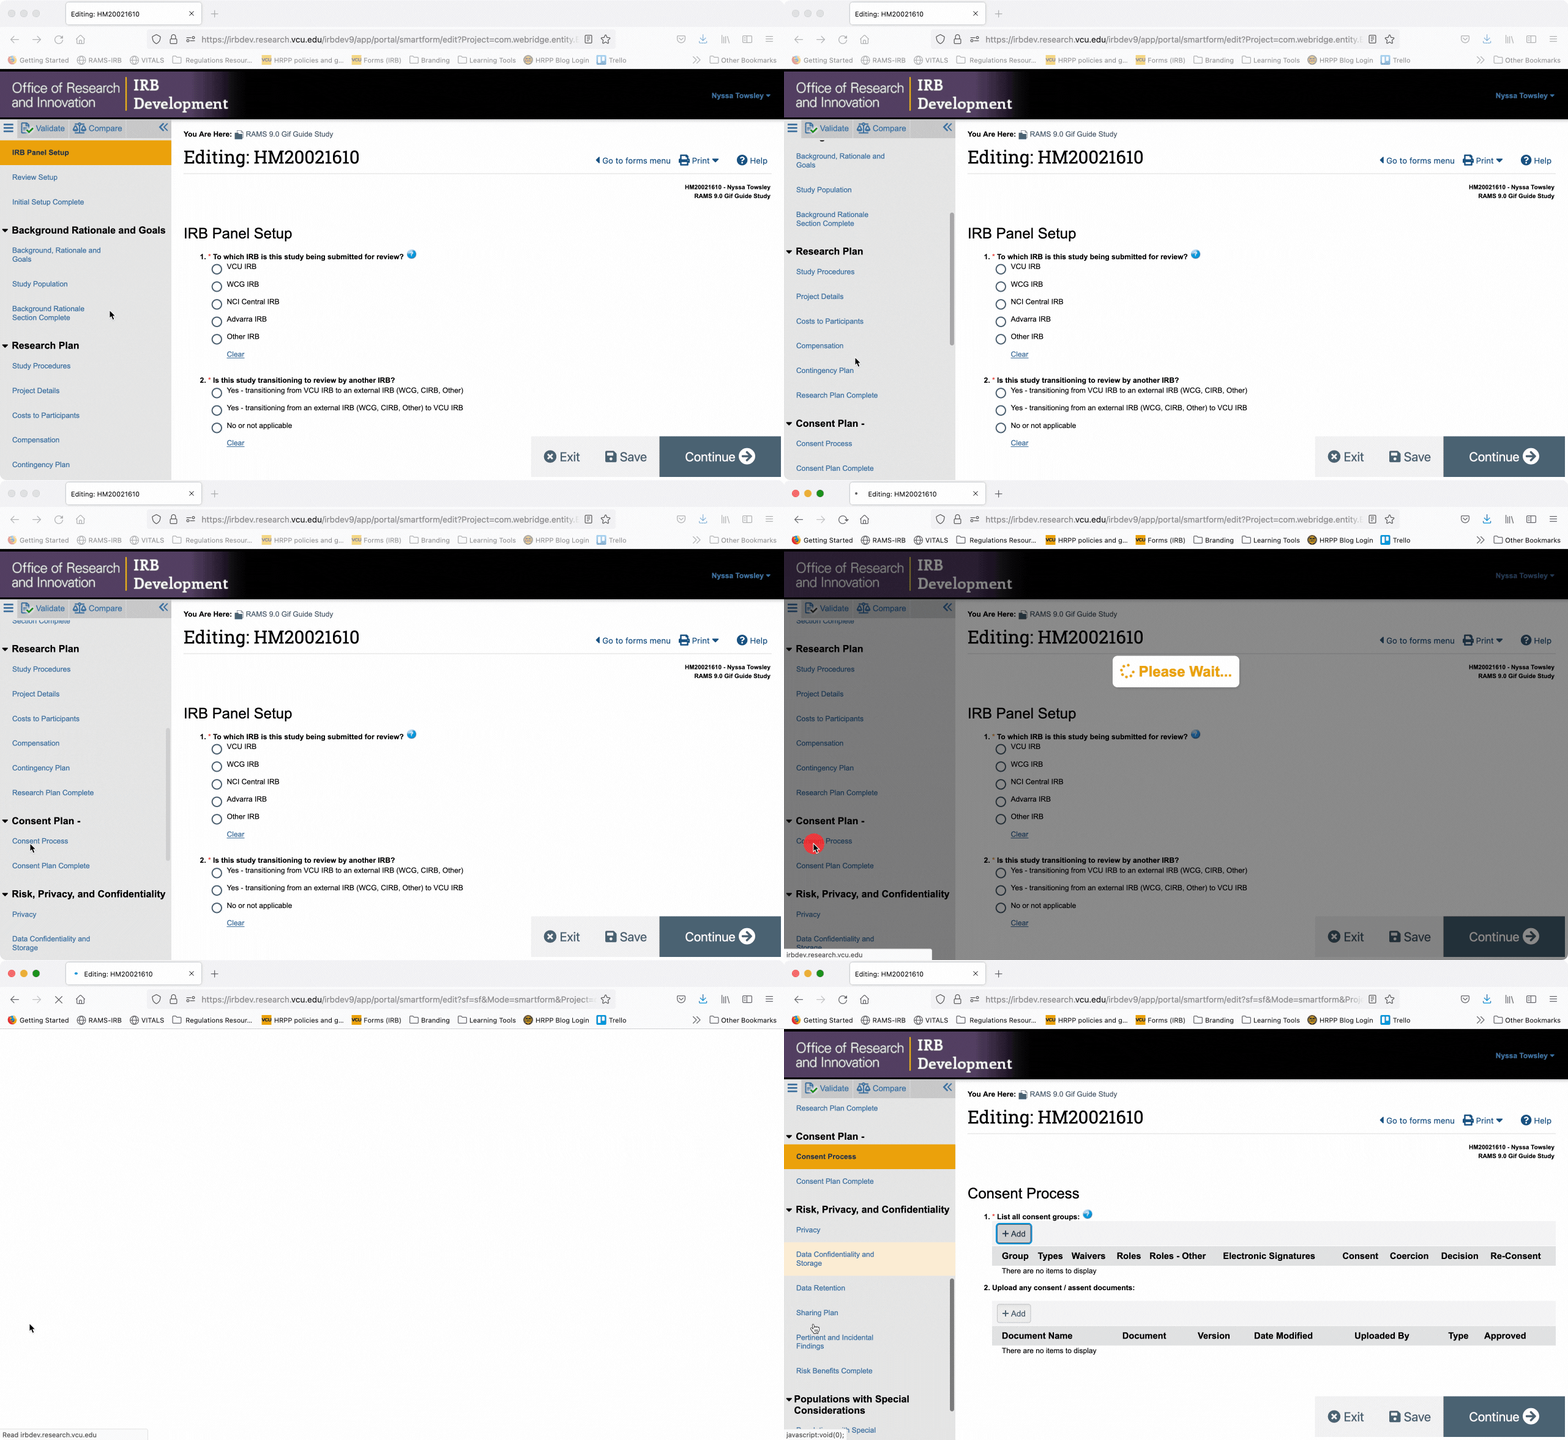
You can collapse the navigation menu by clicking the “<<” button in the upper right corner of the navigation menu. You can re-open the navigation menu by clicking the “>>” button in the upper left corner of the Smartform.
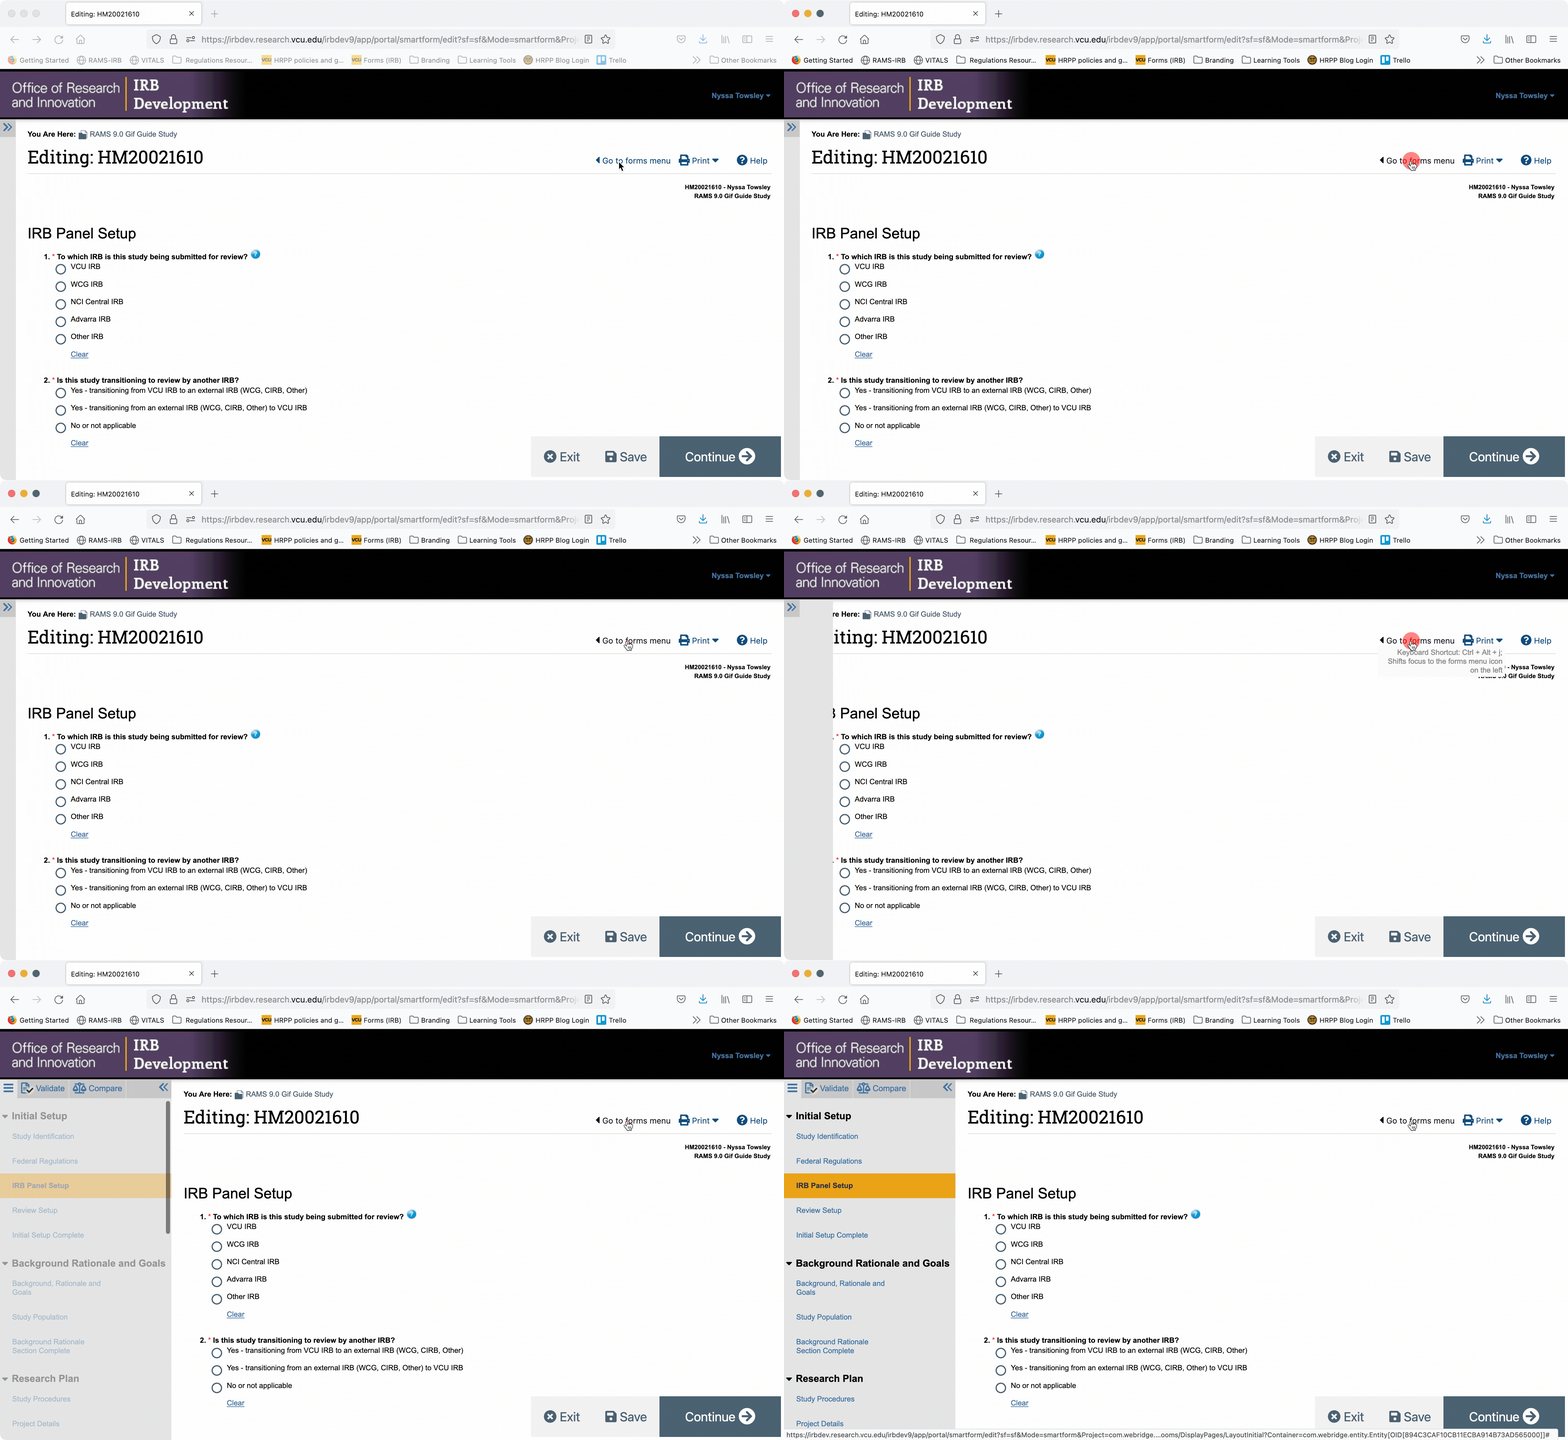
When the navigation menu is closed, you can also re-open it using the “Go to forms menu” button in the upper right of the Smartform.
Saving and Exiting the Smartform
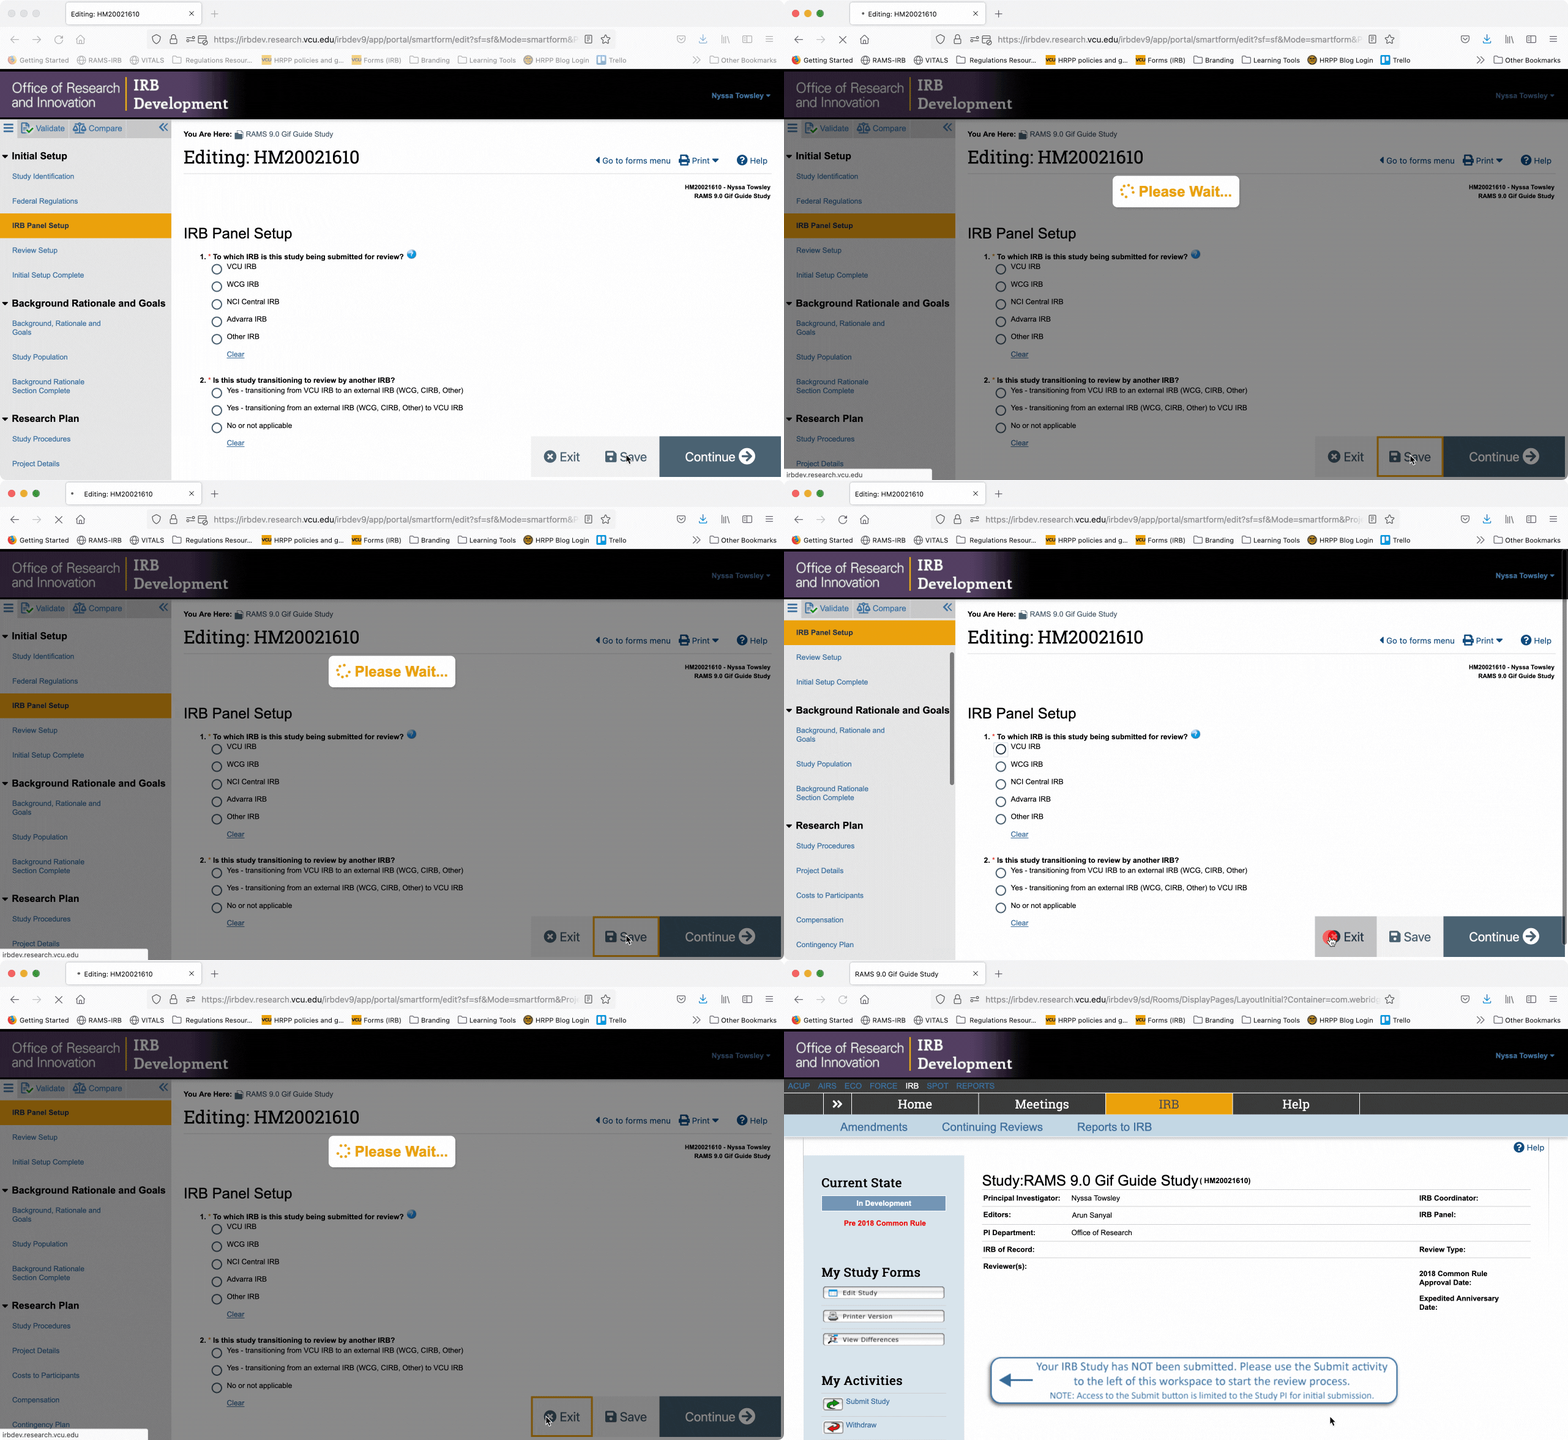
To exit the Smartform and return to the study’s main workspace, use the “Save” button to save your work, and then click the “Exit” button to exit the Smartform. You will then be taken to what we call the study’s “workspace.”
NOTE: Be sure to ALWAYS use the “Save” button before the “Exit” button, to ensure you do not lose any work. It is also a good idea to use the “Save” button periodically while working in the Smartform, to ensure no work is lost.
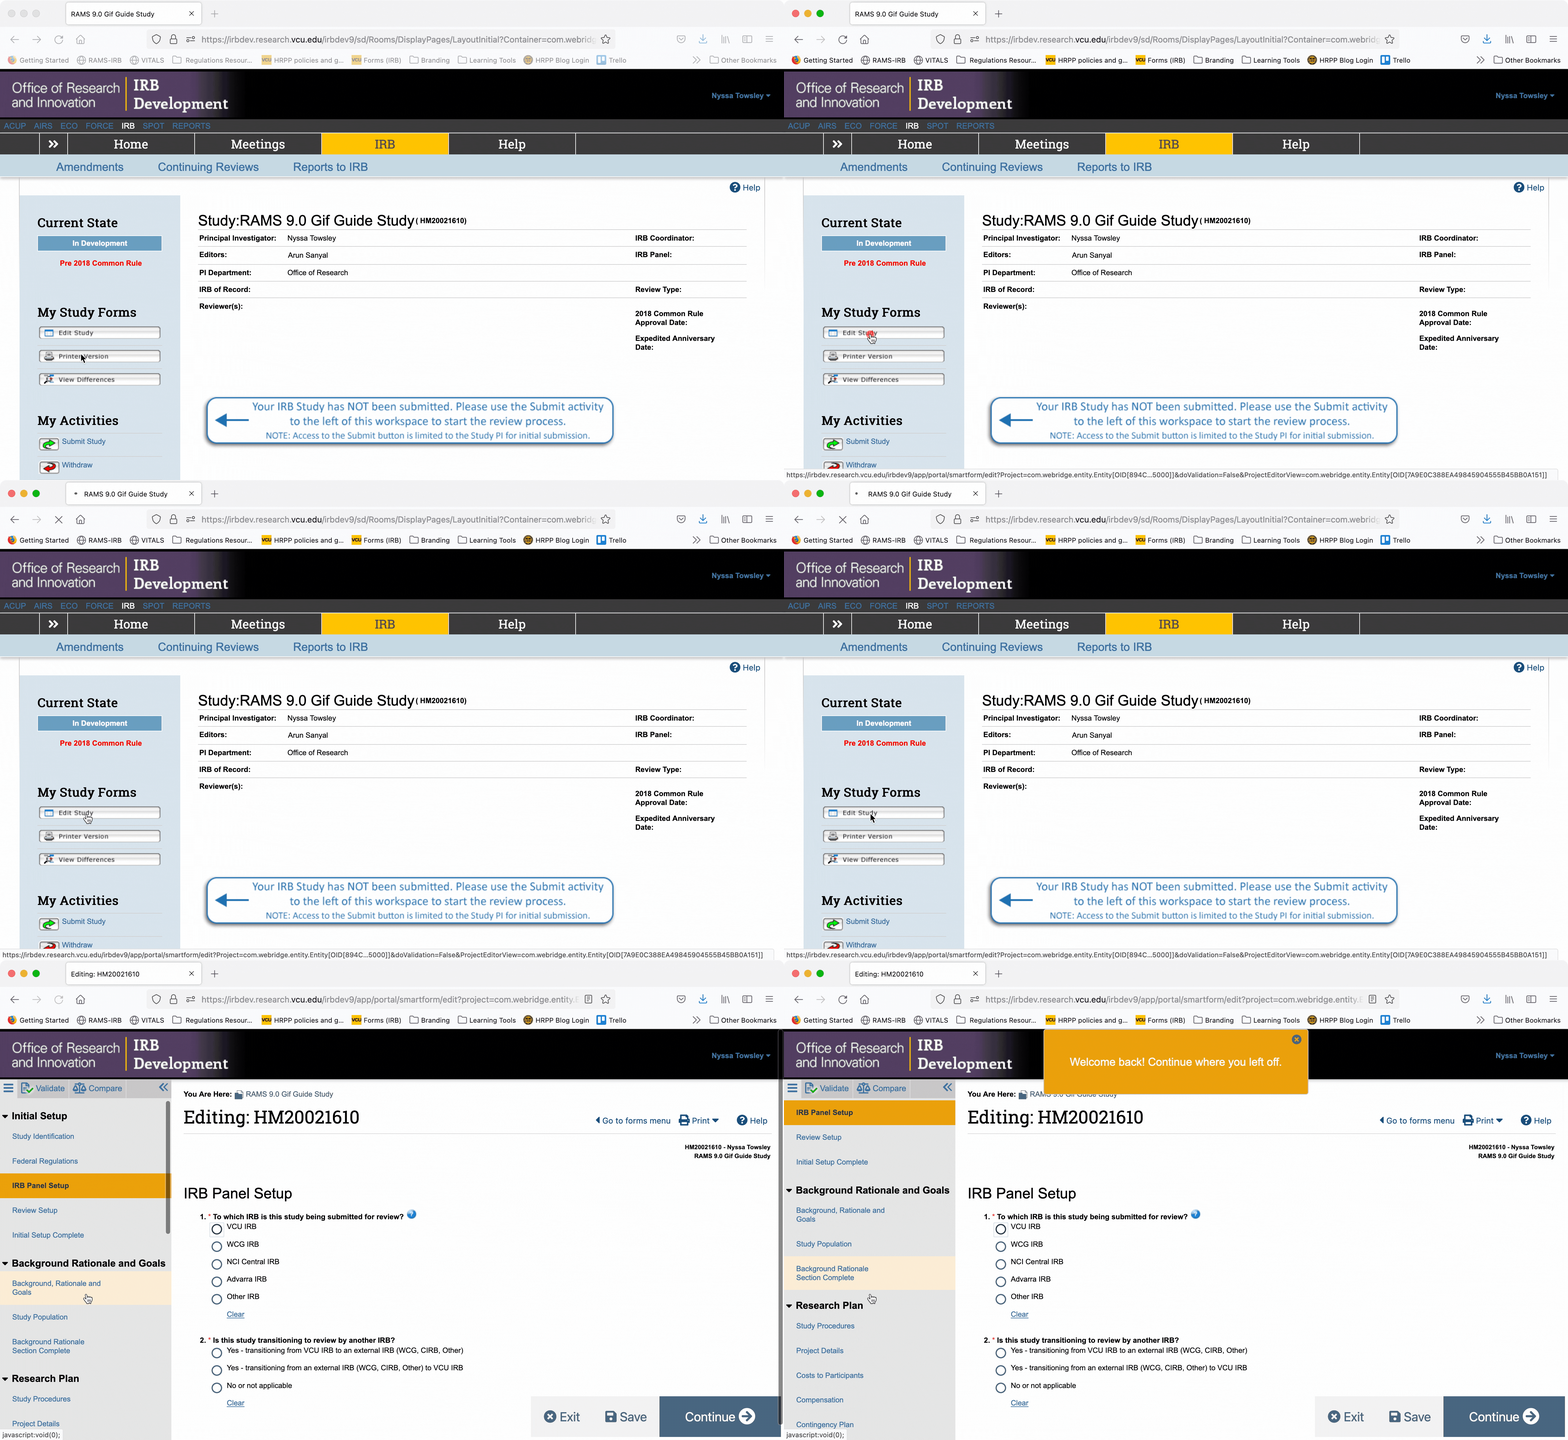
Once in the study’s “workspace,” you can open the editable Smartform by clicking the “Edit Study” button under the “My Study Forms” menu. This will open the Smartform at the page you were last on before you exited.
Printer Version
The Smartform is broken up into sections, with individual pages under each section. If you wish to view the Smartform as a continuous document without needing to navigate between pages, use the “Printer Version.”
The “Printer Version” is NOT editable, but it allows you to view the study Smartform as a whole. This can be useful when reviewing a study as a whole before submitting the study to the IRB for review.
Tip: You can also use ctrl+F (PC) or command+F (Mac) to search the Printer Version for certain key terms or phrases, which can be helpful when you need to locate certain information in the Smartform to change or update it. The Printer Version, as its name implies, is also a printer-friendly version of the Smartform, if you wish to physically print the Smartform.
Generating a Printer Version from the Study Workspace
To generate a Printer Version, click on the “Printer Version” button under the “My Study Forms” menu.
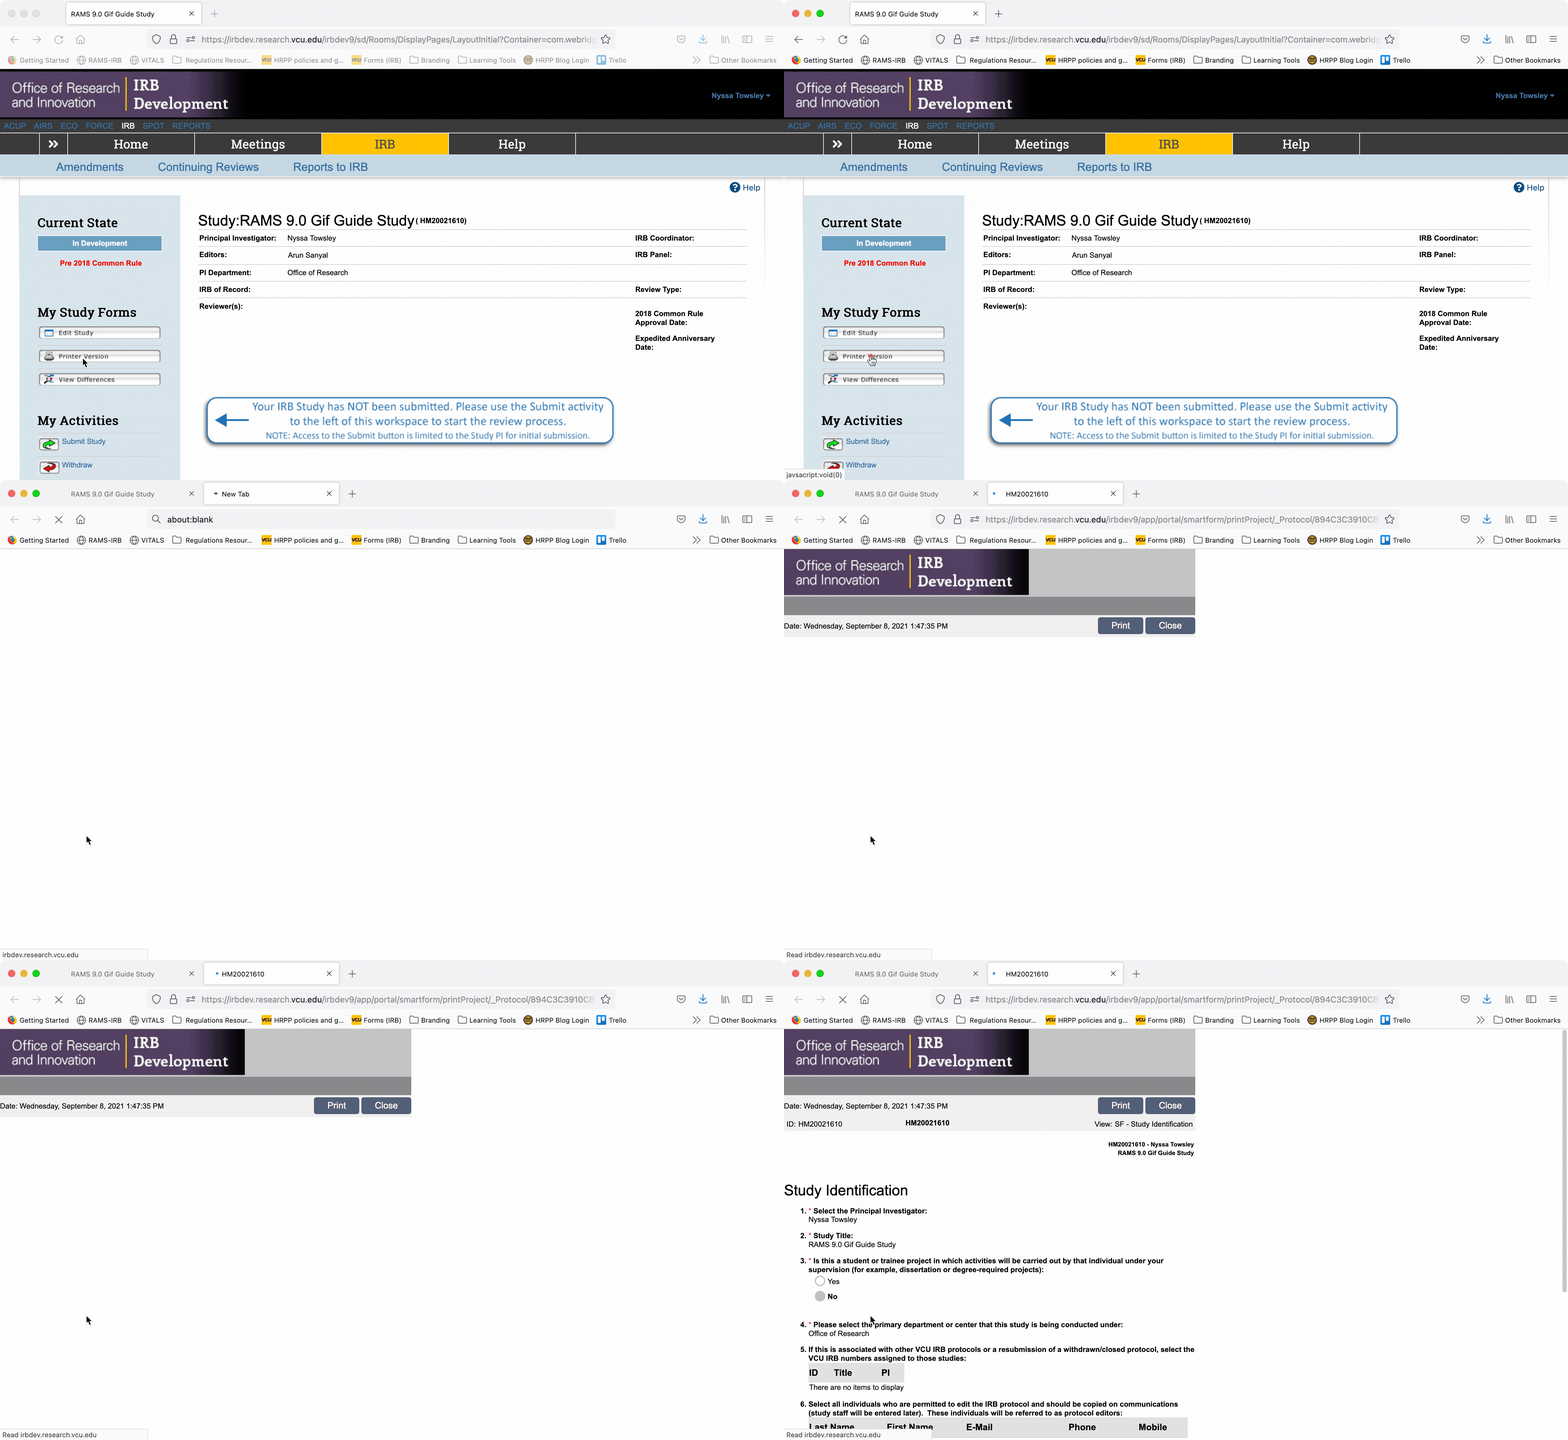
Tip: For both the “Edit Study” button and the “Printer Version” button, use ctrl+click (PC)/command+click (Mac), or right click on the button and select “open in new tab” to open the editable Smartform or the Printer Version in a new browser tab. This may be desirable particularly to make navigation easier, or when making changes to a study during IRB review.
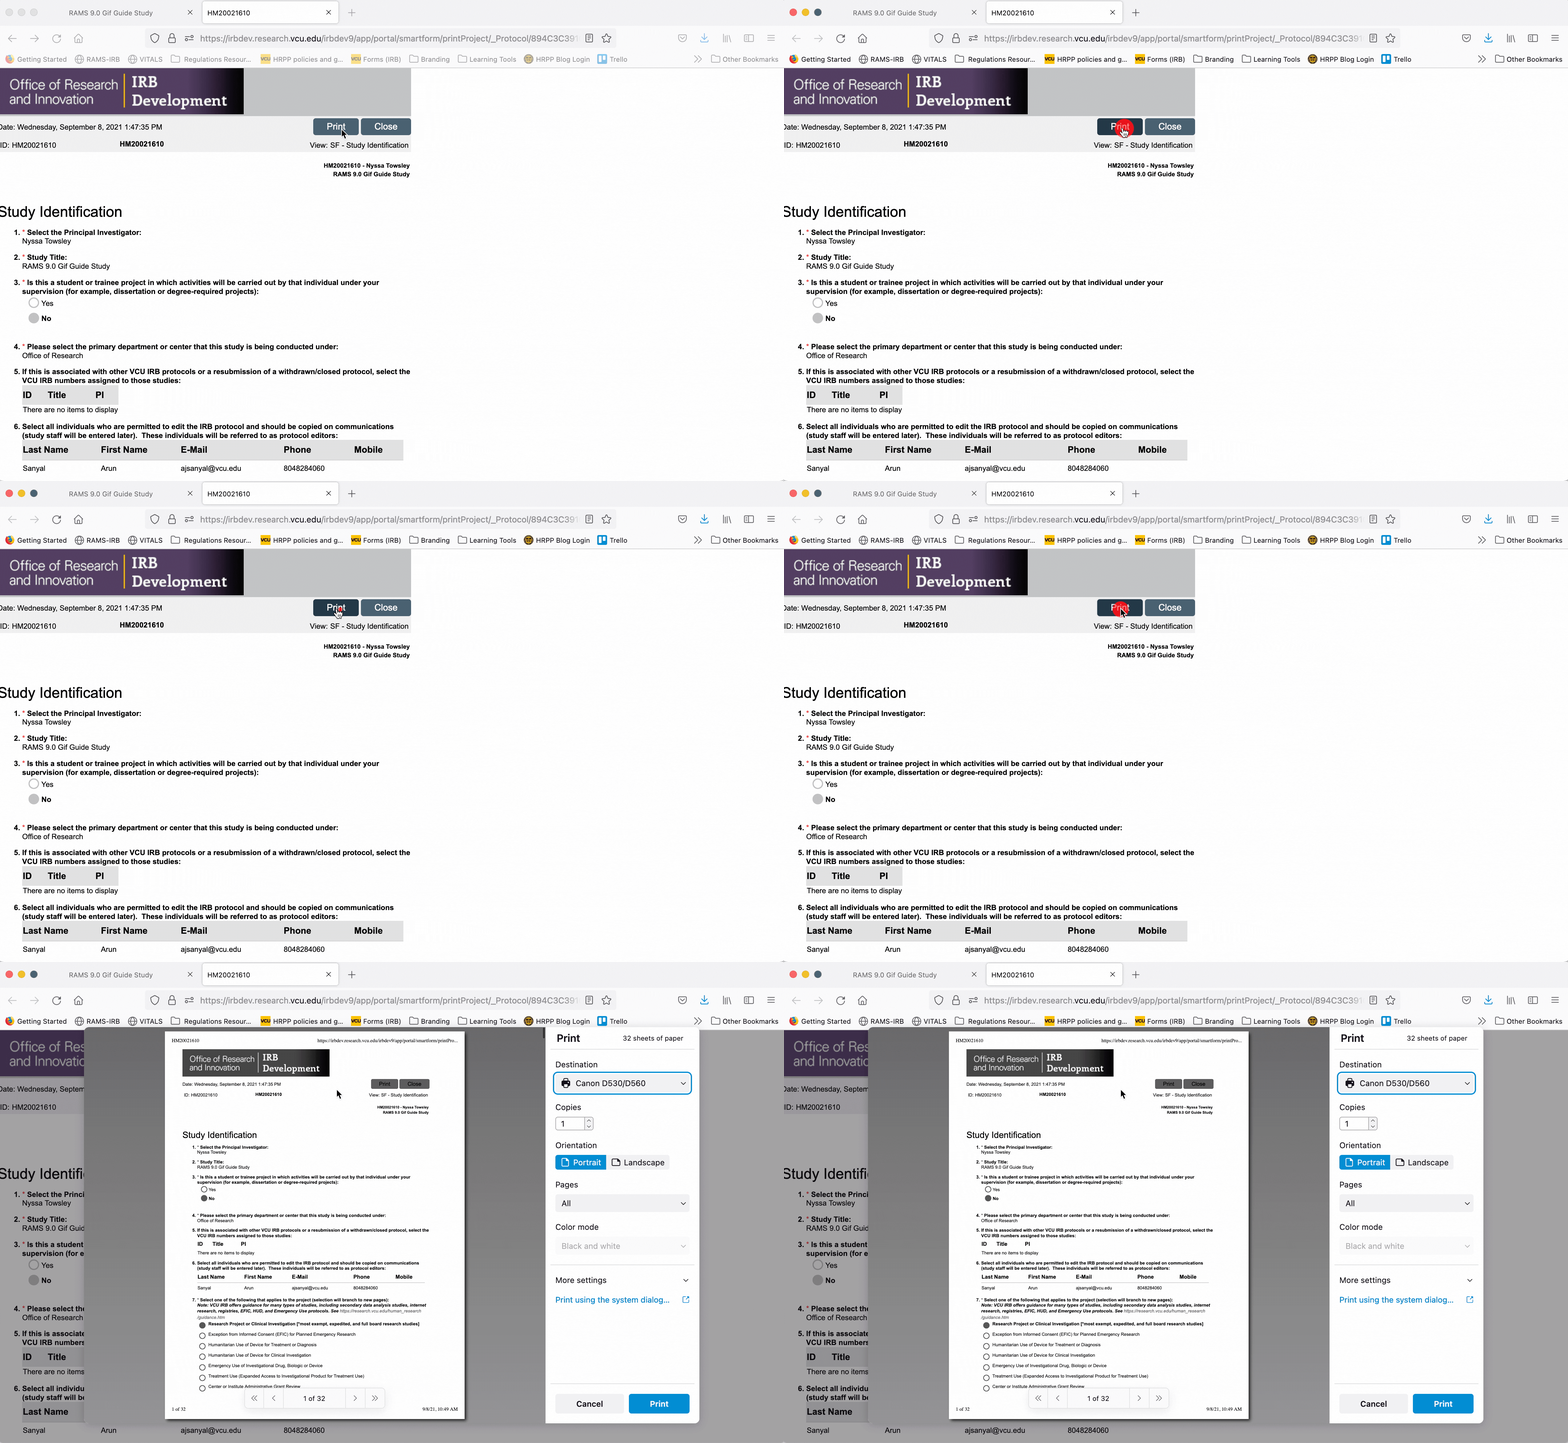
To print the printer version, either as a physical document or to print to PDF, click the “Print” button at the top of the screen and use your browser’s dialogue to print the document.
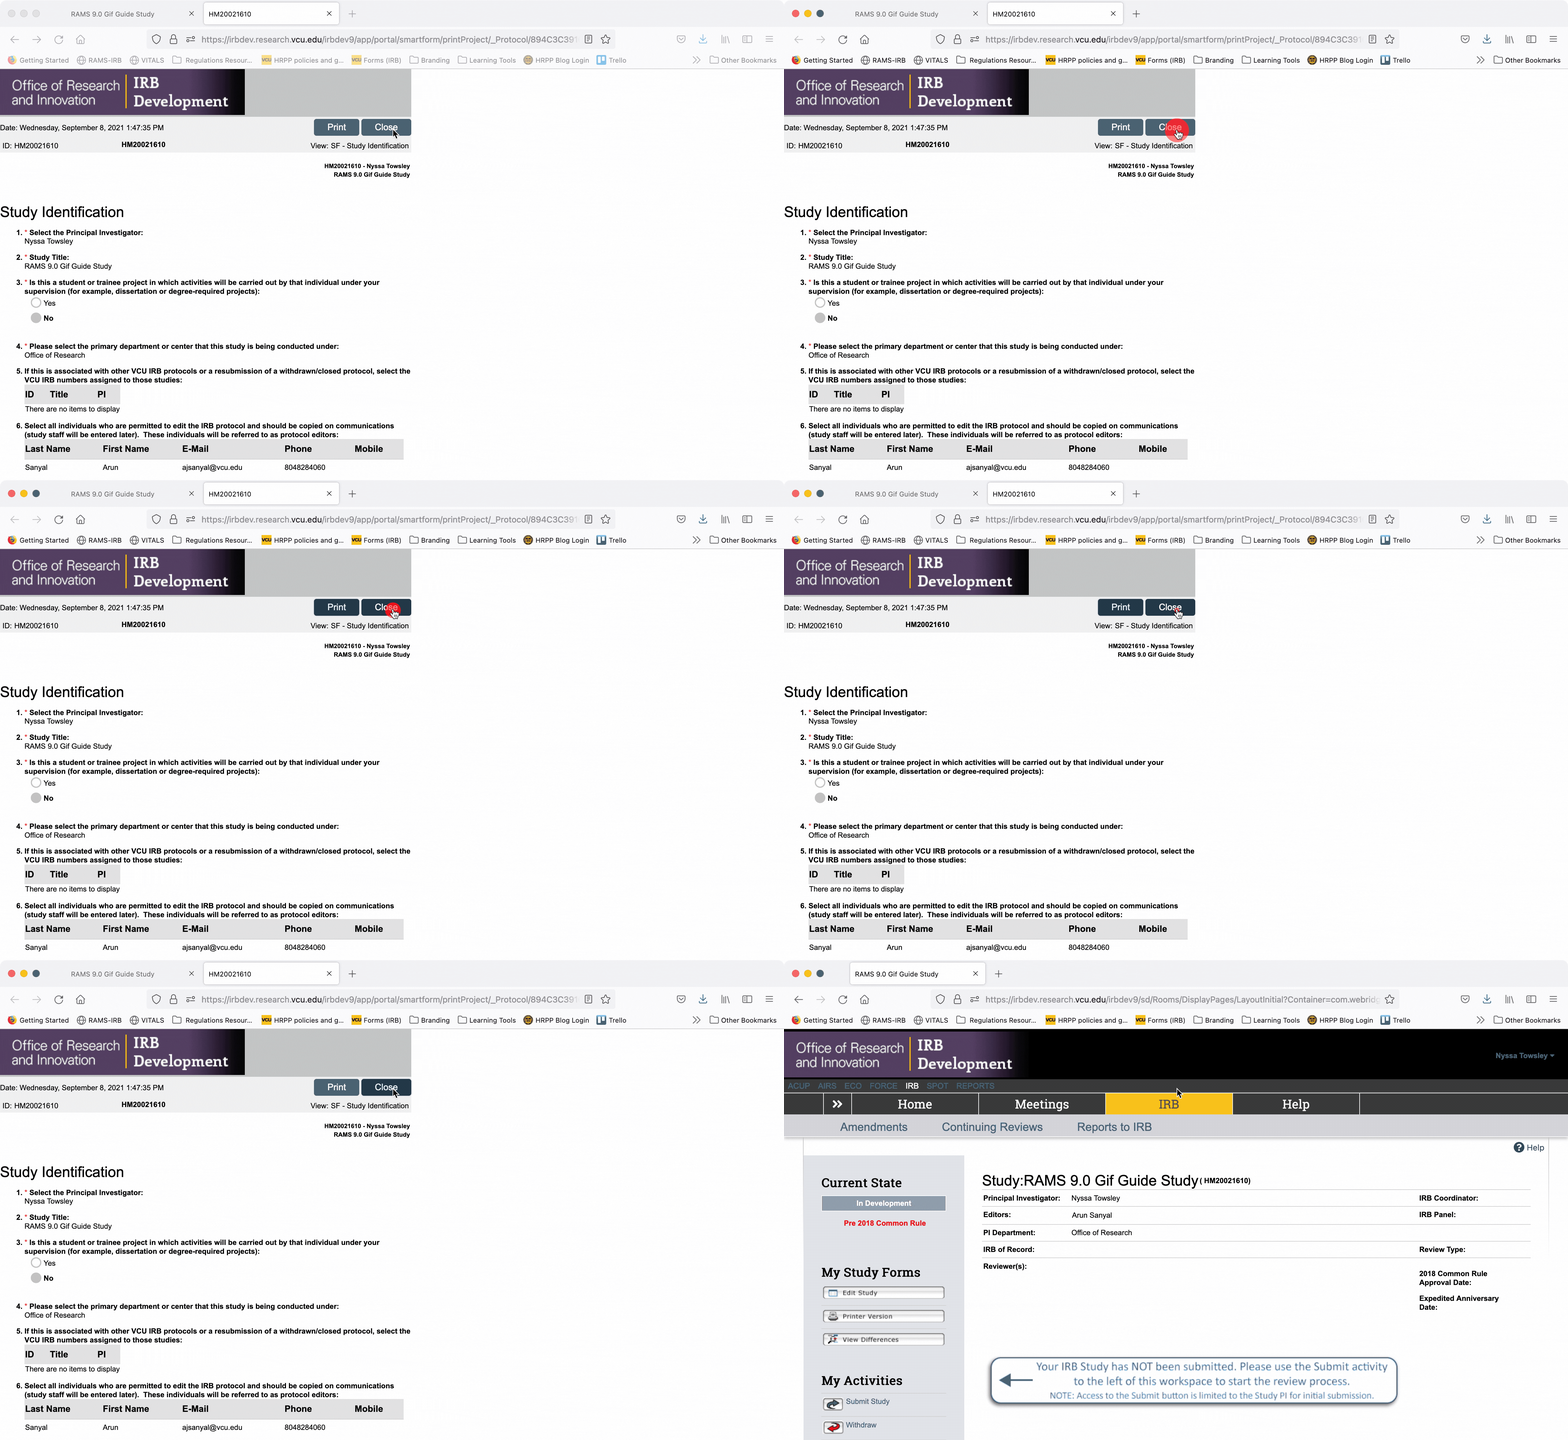
To exit the printer version, click the “Close” button at the top of the page.
Generating a Printer Version from Within the Smartform
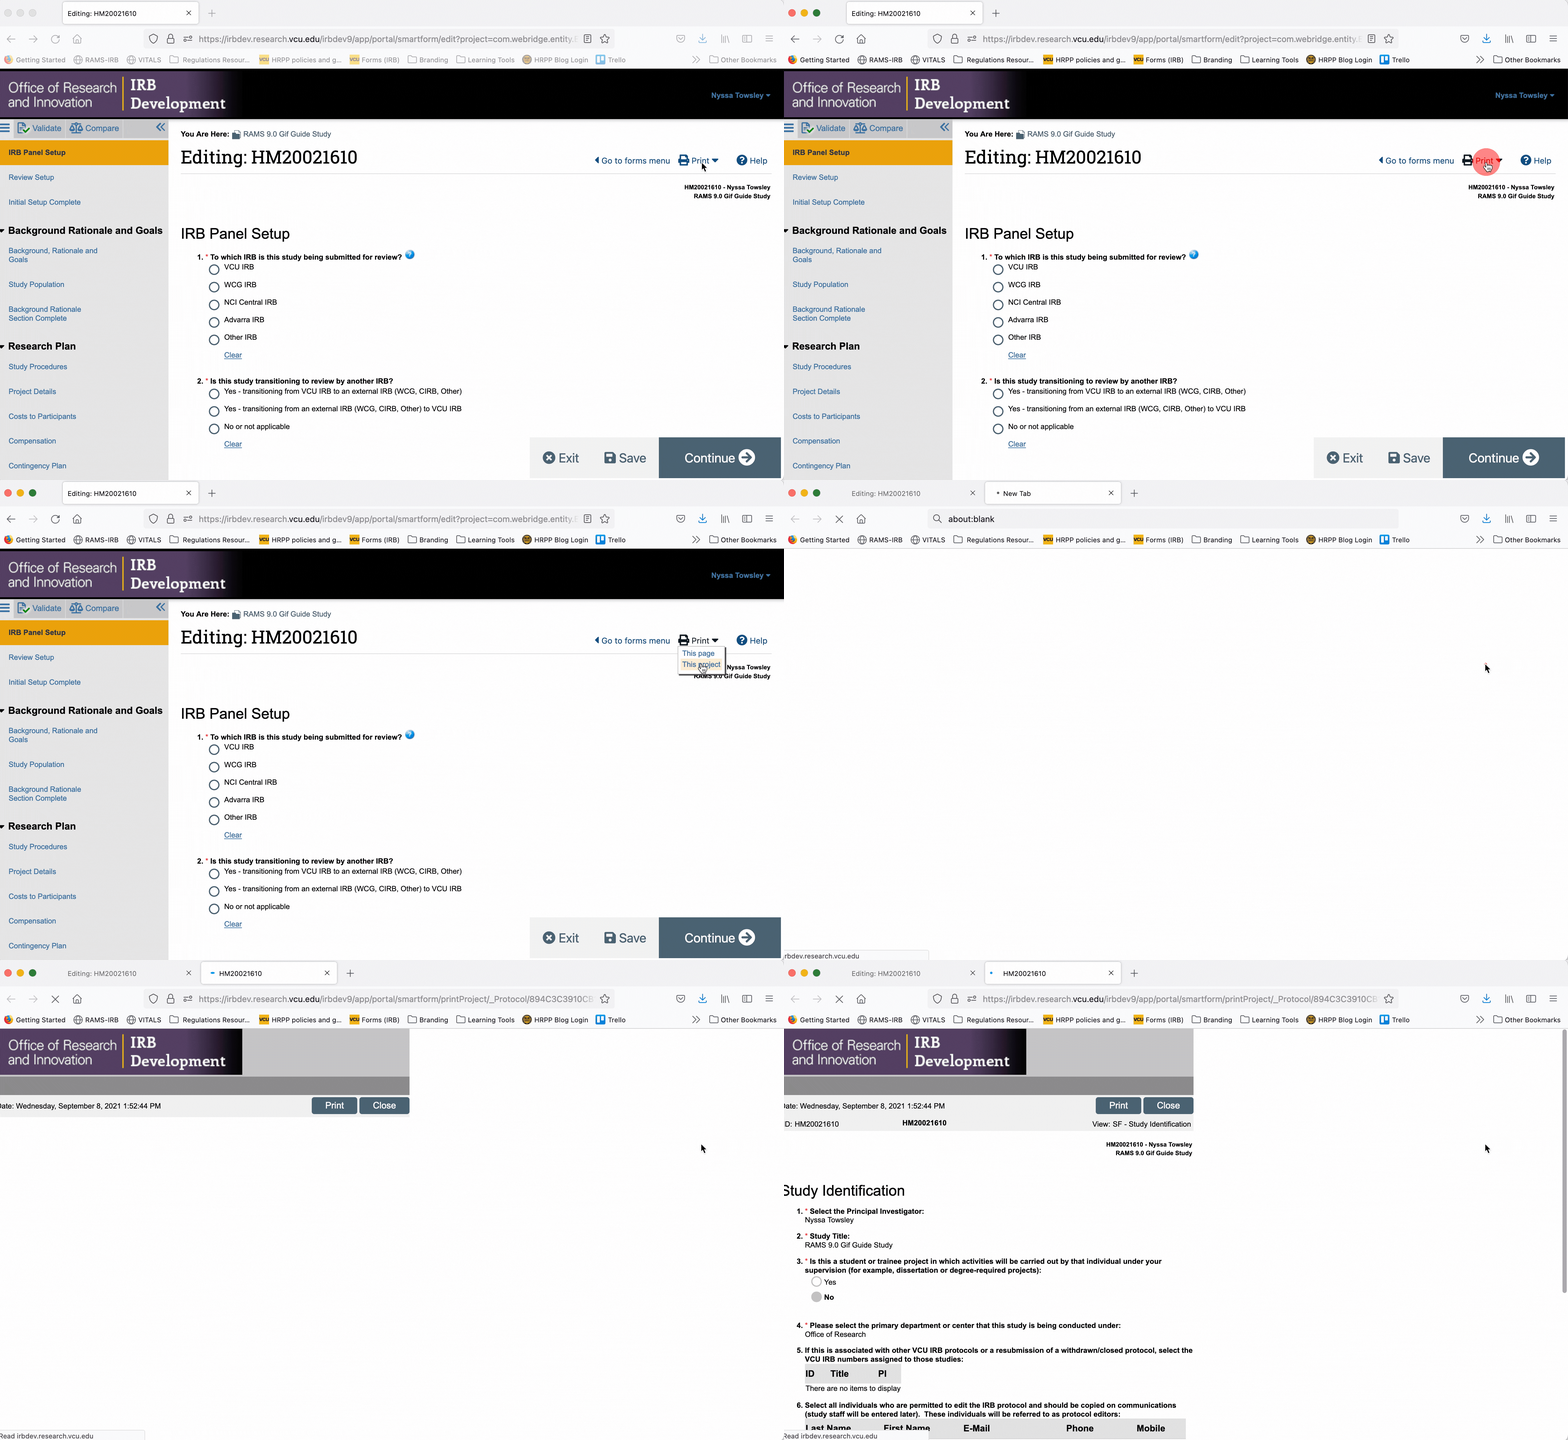
Printer versions can also be accessed from within the Smartform. Using this option, you can generate a printer version for only the page of the Smartform you are currently on, or you can generate a printer version for all pages of the Smartform.
To generate a printer version for only one page of the Smartform, navigate to that page, and click the “Print” button in the upper right corner. Select “This page” from the drop down menu to generate a printer version for that page only.
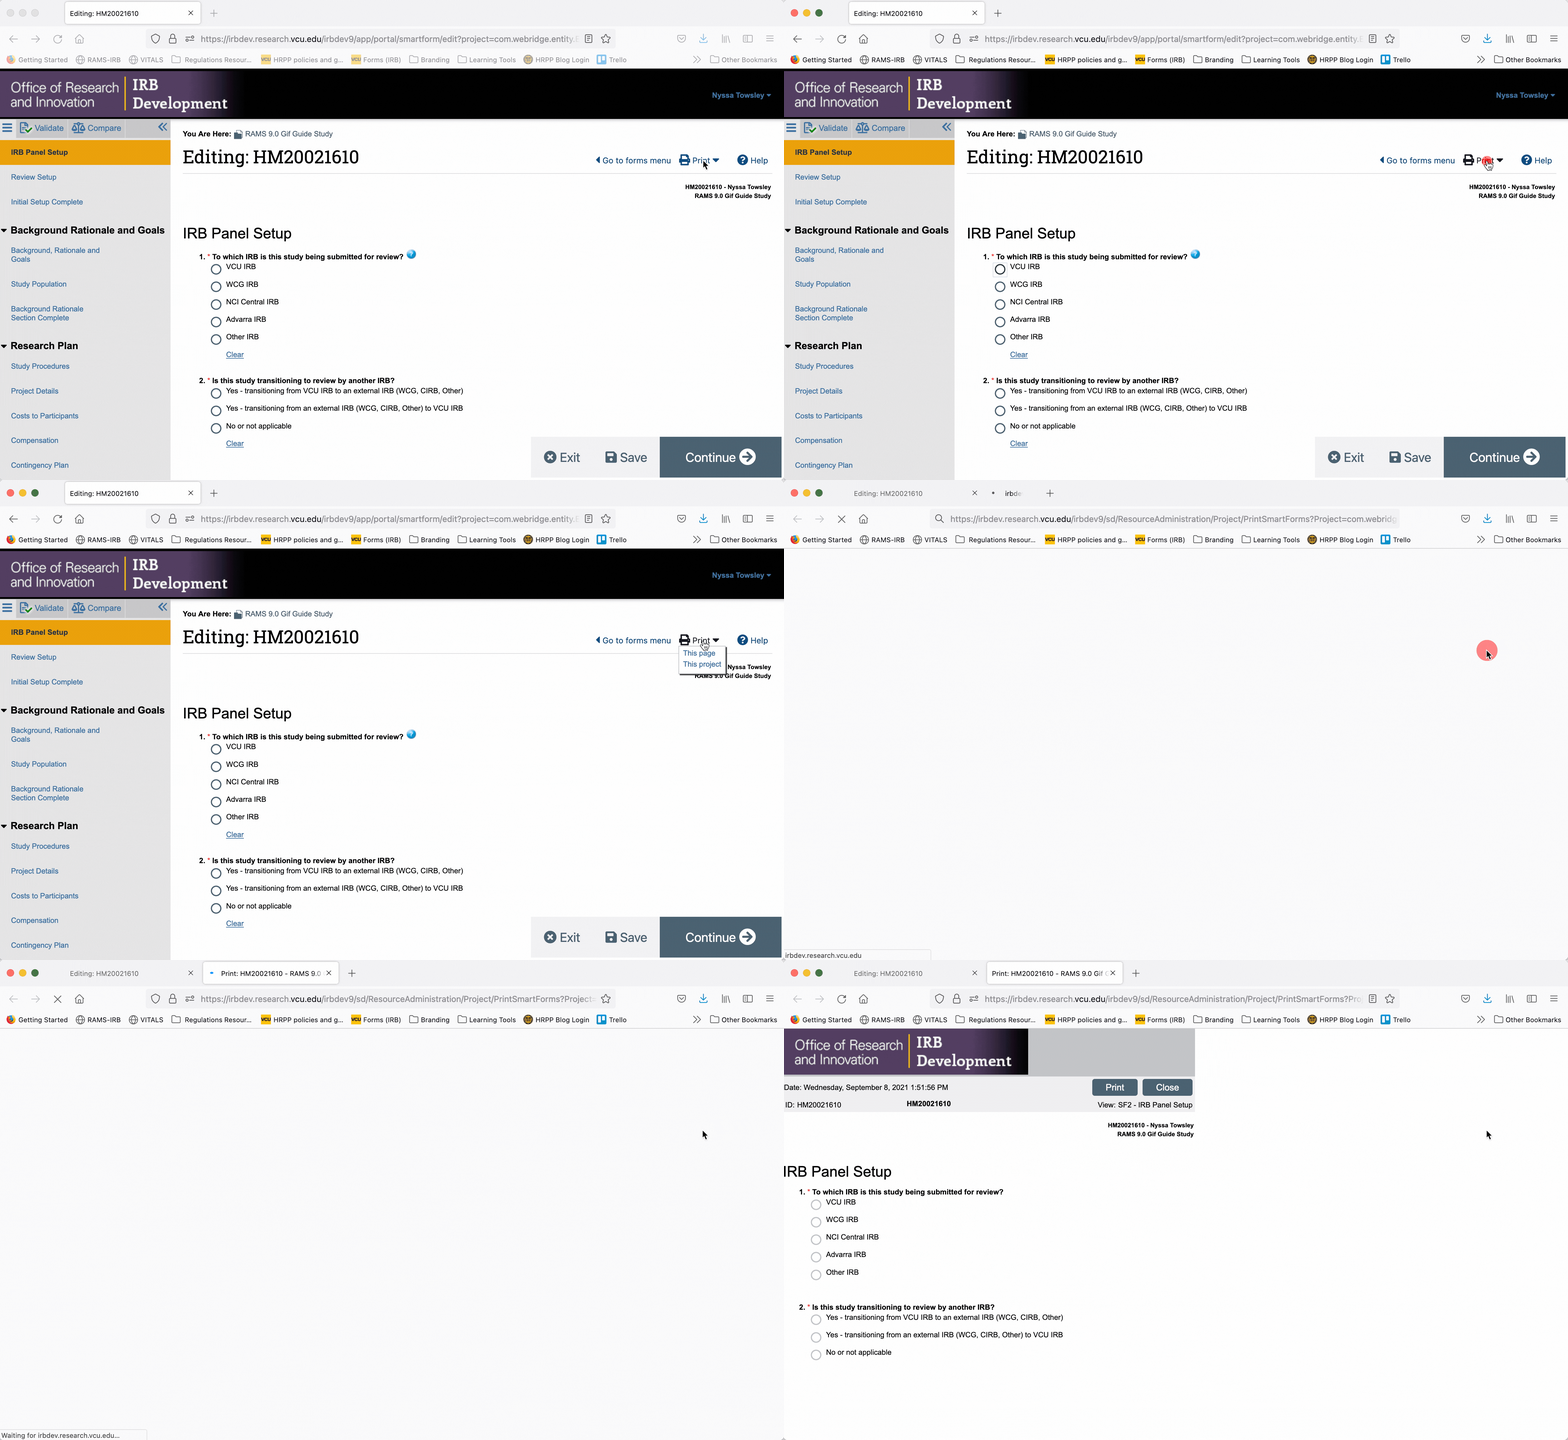
To generate a printer version of the whole Smartform while you are in the Smartform view, click the “Print” button in the upper right, and select “This project” from the drop down menu. This will generate a printer version for all pages of the Smartform.
Submitting a Study
Once the Smartform has been completely filled out, and all appropriate documents have been uploaded (see this gif guide on documents for more information on document management), the PI will need to use the “Submit” button to submit the study for IRB review.
NOTE: Only the person designated as PI will see and be able to use the “submit” button to submit a study. This is because (as you will see), the PI is asked to make certain certifications when submitting a study, which only the PI is allowed to make.
To submit a study, the PI should navigate to the study’s workspace, and then click “Submit Study” from under the “My Activities” menu.

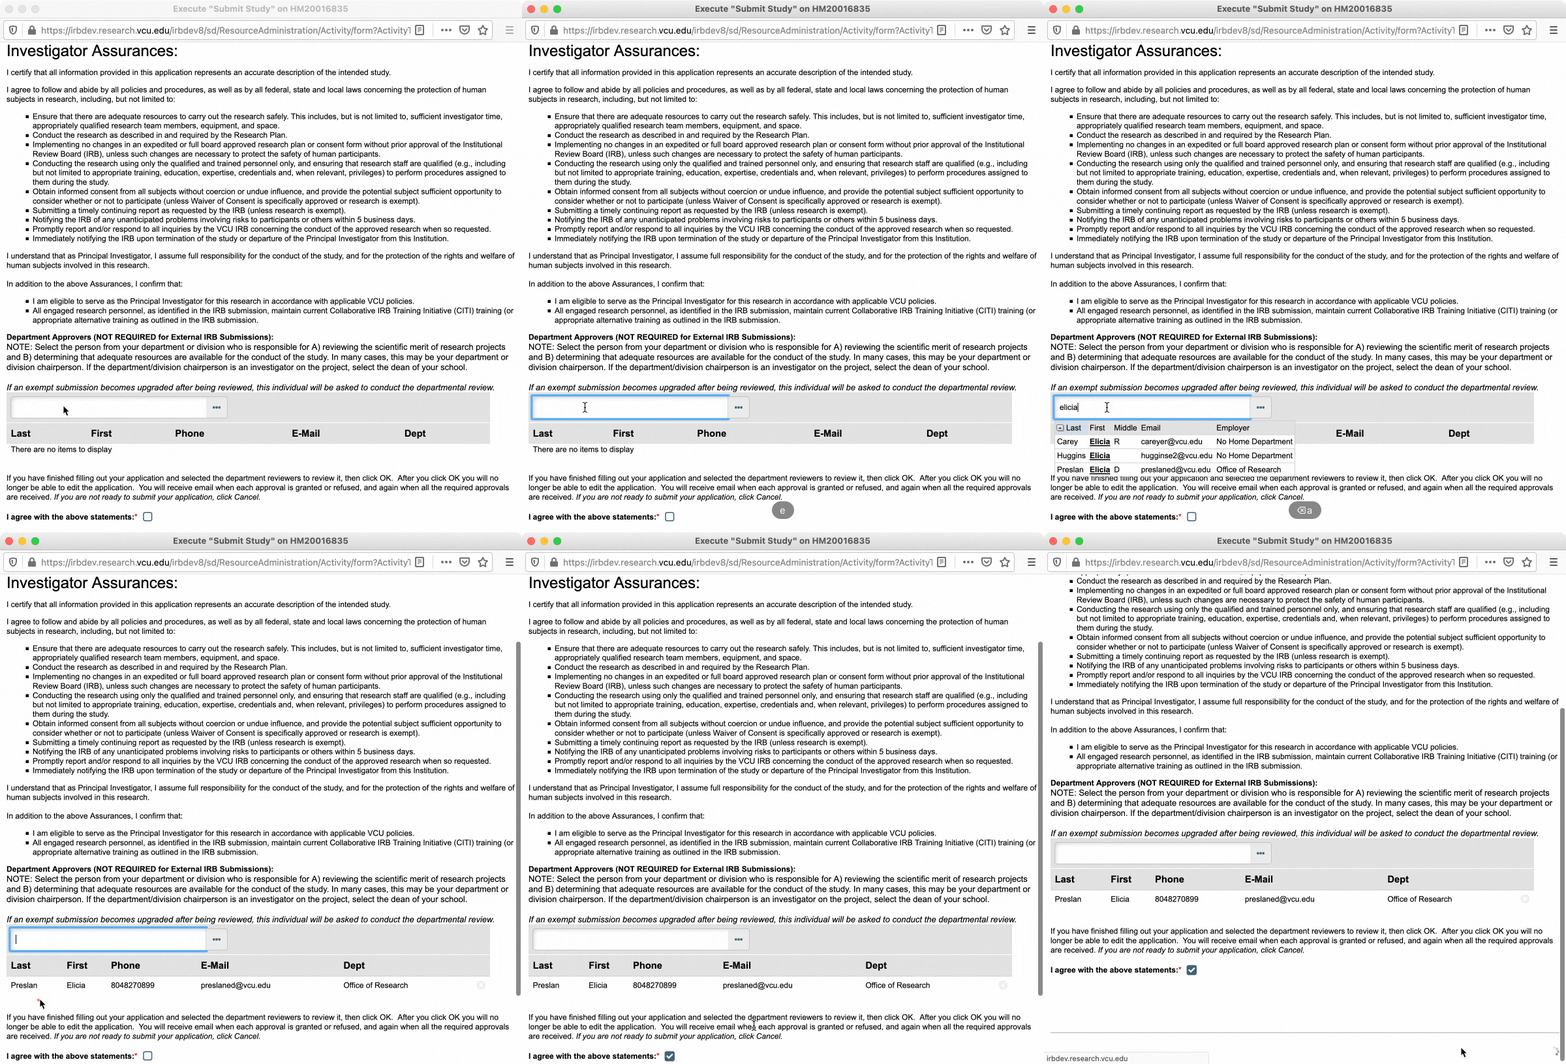
In the pop-up window that appears, read through the investigator assurances and ensure that you are willing and able to assume the responsibility of being a PI. You will also be asked to designate a “department approver” at this time (see section below for more information on department approvers). Once you have completed those steps, check the box to indicate you agree to the investigator assurances, and then click “OK.”
Department Approvers
Department approvers are individuals within your department who review the study for scientific merit and confirm that adequate departmental resources are available for the conduct of the study, prior to the study being routed to the IRB for review. Department approval is only required for expedited and full board research. However, exempt studies will still ask for a department approver when being submitted, in the event that the study is upgraded from exempt to expedited or full board review. In that case, the study would be routed to the assigned department approver after the review type is changed and the study is resubmitted.
Typically, your department approver will be the chair of your department/division. If you are the department/division chair, or the department/division chair is personnel on your study, the applicable Dean is the next best option. Department/division chairs and Deans may select appropriately qualified designees to serve in this role in their place. Talk to your department/division chair to determine who should be designated as department approver for your study.
Categories Education and Training
Comments
Comments are closed.